Adding Voice Intermediate Tutorial
Overview[edit | edit source]
This chapter will explain how to utilize the Creation Kit in creating voiced quests.
The reader will learn:
- How the Creation Kit and Skyrim handles voice files.
- How to create a custom voice type.
- How to apply custom voice type to NPCs.
- Using the built-in recorder.
- Acquiring voice actors.
Introduction and Vanilla Voice Types[edit | edit source]
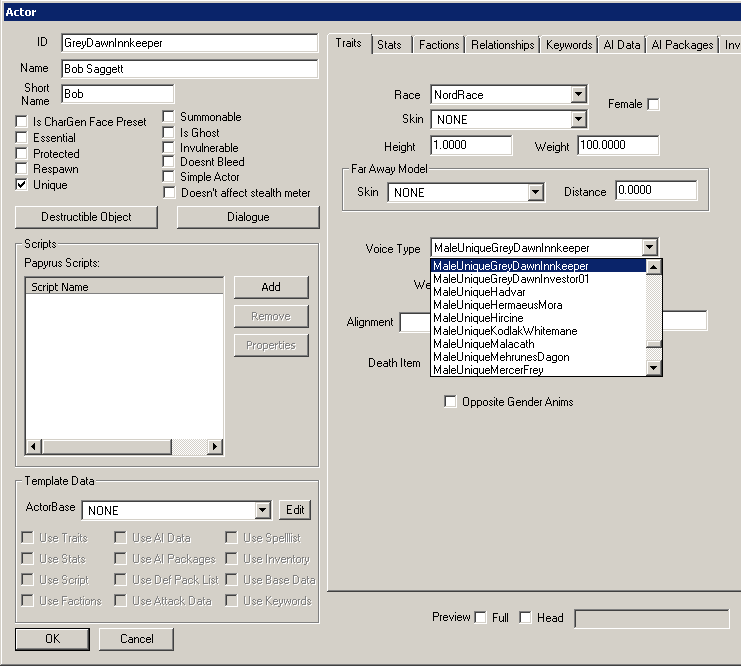
Actors, including NPCs and creatures, have a predefined Voice Type in their Traits tab that specifies their available dialogue lines. In Skyrim, multiple Actors may share the same Voice Type, usually correlating to them being voiced by the same voice actor.
The Voice Type for a specific Actor can be found at the bottom of their Traits tab.
In addition to serving as an in-game condition, specifying a Voice Type helps developers organize dialogue sound files in a hierarchal folder structure according to the plug-in name.
Below is an example of a recorded dialogue line called "darkbrothe_dbrumorstopic_000153b8_1", a line spoken by an Actor with the "MaleBrute" Voice Type, and a dialogue line added by Skyrim.esm:
Data\Sound\Voice\Skyrim.esm\MaleBrute\DarkBrother_DBRumorsTopic_000153B8_1.fuz
Because vanilla Voice Types can be used by third-party mods as well, here’s a newly added dialogue line added by the plug-in MyNewMod.esp:
Data\Sound\Voice\MyNewMod.esp\MaleBrute\MyQuest_MyTopic_000113C9_1.fuz
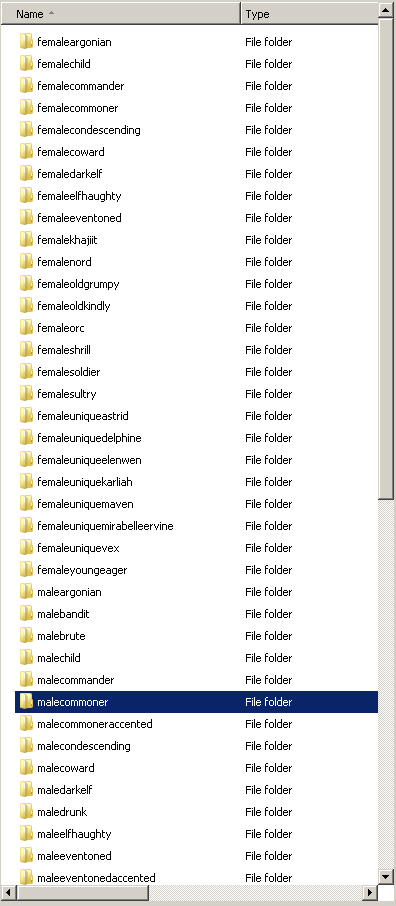
Skyrim’s voice files can be found in the Skyrim - Voices.bsa and Skyrim - VoicesExtra.bsa. Below is a sample of the extracted folders. Within each folder are numerous dialogue sound files.
Dialogue file names are automatically generated when creating dialogue line in the Creation Kit and cannot be changed. Sound files must be named the same way in order to properly play.
The name contains condensed information, such as the dialogue line’s parent quest and topic:
(Quest)_(Topic)_(Hexadecimal Base ID)_(Dialogue Line #).(File Format)
Custom Voice Types[edit | edit source]
New Voice Types can be created underneath the Character >> Voice Type category.
For this tutorial, double-click MaleUniqueEsbern.
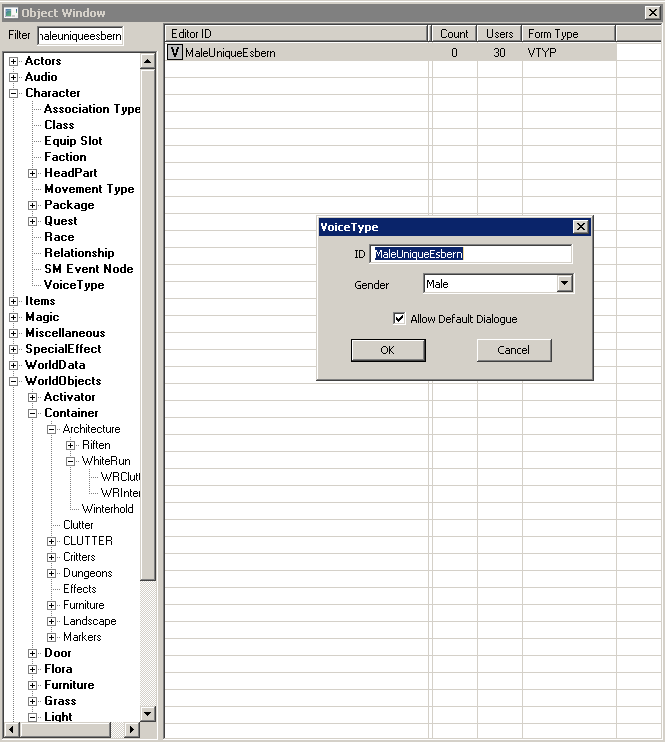
Change the ID to a custom name. (Note: The screenshot below contains the error of prefixing the name with "Male" but switching the Gender to "Female". This is bad practice, but does not prevent the Voice Type from functioning for female Actors)
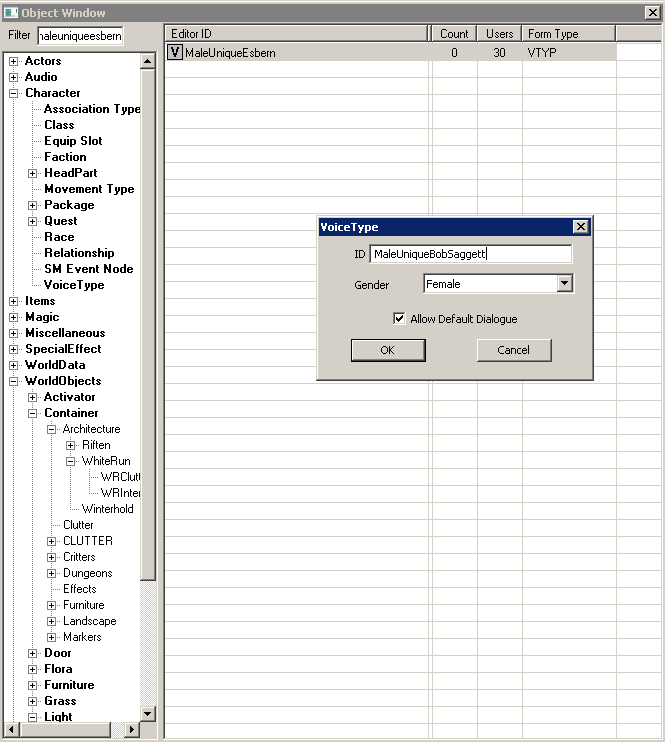
Select Ok and Yes when asked to create a new voice type.
Adding a Custom Voice Type to an Actor[edit | edit source]
Select the desired Actor and apply the new Voice Type by selecting in the Voice Type dropdown box at the bottom of the Traits tab.
Using the Built-in Recorder[edit | edit source]
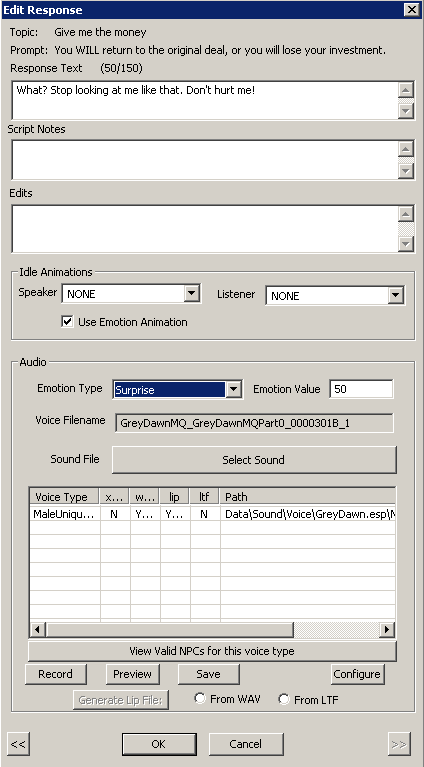
Selecting a dialogue line will open up the Edit Response window. The Audio section of the window features a built-in recorder.
While limited compared to third-party recording software, the Creation Kit’s audio recorder allows for a voice actor to record a line and have it automatically saved to the following directory:
Data\Sound\Voice\temp.wav
Here is a list of the recorder's buttons:
- Record - start recording audio input
- Preview - (possibly deprecated/nonfunctional)
- Save - save and commit the temp.wav to the appropriate Voice Type folder
- Configure - (possibly deprecated; may show list of available audio devices)
- Generate Lip File - generates the lip-synch file associated with a dialogue line
Note: The voicetypes listed in the Edit Response page are based off of the conditions on the Topic Info page. If the voicetype you're looking for isn't listed, close the Edit Response window and check your conditions on the Topic Info. Some conditions are met dynamically, such as membership in a faction or a quest alias; in such cases, the conditions may keep the voicetypes from displaying in the Edit Response window. These conditions should be added after recording dialogue and editing the response.
Voice File Compression[edit | edit source]
Bethesda uses the proprietary software to compress a sound file (WAV, XWM) and lip-synch file (LIP) into a FUZ file. However, users can download the following community tool to compress and extract FUZ files:
Unfuzer (Skyrim Nexus) [1]
While WAV and XWM files are functional in-game, they take up far greater disk-space and may limit mod distribution.
Exporting Dialogue Lines[edit | edit source]
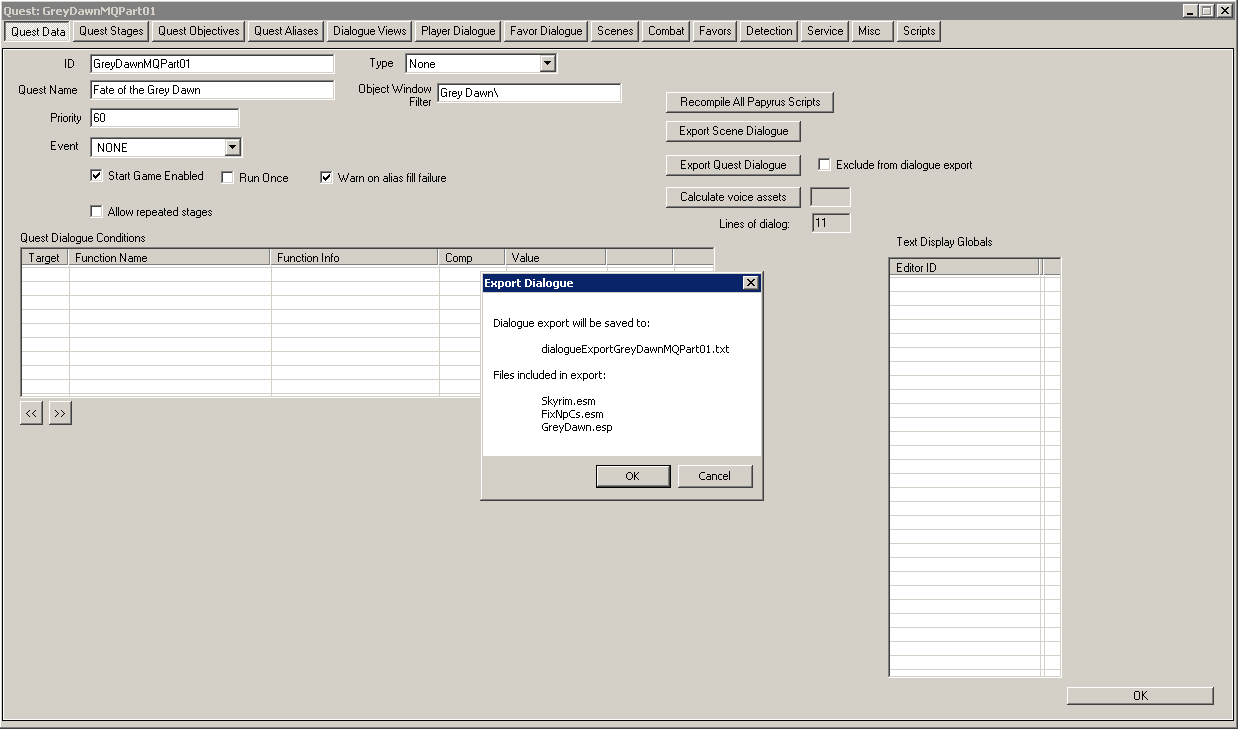
To accelerate distribution of a character's script to a voice actor and ensure that a dialogue line is not missing a sound file, the Creation Kit provides an Export Dialogue feature for every Quest under the Quest Data tab.
- Export Scene Dialogue - exports only dialogue contained within the Quest's Scenes.
- Export Quest Dialogue - exports all dialogue contained witin the Quest.
The exported dialogue will be saved as a delimited .txt document in the main Skyrim folder (the Data folder's parent directory) with the prefix "dialogueExport" followed by the quest name (such as "MyQuest"):
Skyrim\dialogueExportMyQuest.txt
Opening the text document in a spreadsheet program displays several columns, including:
- Voice Type
- Quest
- Branch - dialogue line's parent Branch
- Category - type of dialogue (topic, miscellaneous)
- Topic - dialogue line's parent Topic
- Response - the response line number
- Filename - the generated file name for the line
- File Found - whether the dialogue line has an associated sound file (Note: only detects XWM files)
- Topic Text - the dialogue line
- Emotion - the emotional facial morphing expressed by the NPC
Filtering columns using the spreadsheet's available tools can help in editing together the final script for a voice actor and quickly searching for a missing sound file.
Voice Actor Sources[edit | edit source]
Below is a list of communities providing free voice acting services for Skyrim mods and other projects:
