Bethesda Tutorial Navmesh/pl
Siatka nawigacyjna Navmesh
| Strona w języku polskim Wymaga przetłumaczenia całości lub wybranych fragmentów tekstu |
| Siatka nawigacyjna Navmesh | |
|---|---|
| seria: Budowanie lokacji od podstaw, rozdział: 4 | |
| Powrót do spisu poradników | |
| Następny poradnik | |
| Przykładowe pluginy: | |
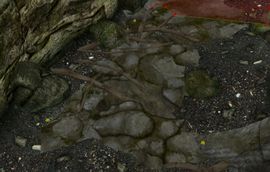
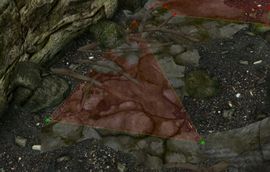
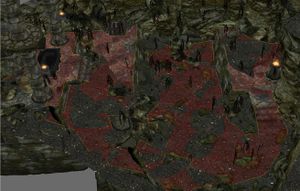
| Początkowy | Wynikowy |
| Powiązany poradnik wideo | |
Przegląd
W tym rozdziale omówimy procesy tworzenia siatki nawigacyjnej Navmesh dla postaci, zarówno w sposób ręczny, jak i automatyczny.
Czytelnik nauczy się:
- Czym jest "Navmesh" i dlaczego jest ważna
- W jaki sposób stworzyć Navmesh automatycznie
- Jak można edytować ręcznie
- Jak naprawiać ostrzeżenia dotyczące Navmesh
- Generating basic cover
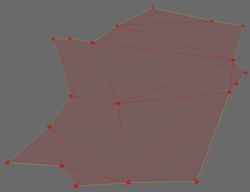
Gdy skończysz budować lokację z klocków i zapełniać ją różnymi rzeczami, możesz sobie pogratulować i przejść do tworzenia Navmesh. Navmesh to zbiór płaskich figur, którymi wykładamy podłogę w lokacji, a dzięki nim postacie kierowane przez komputer w grze będą wiedziały gdzie mogą się poruszać. Dlatego ważne jest ukończenie budowania lokacji zanim przystąpi się do wykładania podłogi płaszczyznami Navmesh.
Podczas grania często nawet nie zwracamy uwagi na wiele różnych informacji i danych, które pojawiają się wszędzie wokół. Nasz mózg przetwarza każdy wizualny detal, nieustannie wyciągając wnioski i przewidując skutki różnych działań. Niestety sztuczna inteligencja nie jest w stanie dorównać ludzkiej i musi polegać na danych, które dostarczymy jej my, twórcy modów. Navmesh to bardzo ważna wiedza, jaką aktor posiada na temat otaczającej go przestrzeni. Poprawnie zbudowana powierzchnia Navmesh to czynnik, który ma ogromne znaczenie dla możliwie najlepszego działania sztucznej inteligencji.
Edytor siatki Navmesh jest dosyć rozbudowany i początkującym może sprawiać problemy. Poznamy go krok po kroku. Gdy już nauczysz się podstaw i zdobędziesz trochę praktyki, to nawet się nie zorientujesz kiedy zostaniesz ekspertem od Navmesh.

Dla użytkowników znających Navmesh z GECK, ręczne tworzenie nie zmieniło się zbytnio. Jest za to kilka nowości dotyczących automatycznego generowania, w tym tryb "Recast", który omówimy w tym rozdziale. Więcej informacji o dostępnych procesach automatycznego generowanie znajdziesz na stronie Generowanie Navmesh. Użytkownicy Construction Set z Oblivion lub Morrowind z pewnością od razu zauważą, że Navmesh całkowicie zastąpił węzłowy system odnajdywania drogi przez postacie.
Aby zacząć w ogóle pracę nad nawigacją dla postaci, trzeba zmienić tryb pracy edytora. Wystarczy kliknąć na ikonkę Navmesh (rysunek 4.1) na pasku narzędzi albo nacisnąć CTRL+E. Pojawi się cały długaśny pasek dodatkowych narzędzi (rysunek 4.2), które służą tylko do pracy w trybie Navmesh.
Właściwie nie potrzebujemy wszystkich funkcji z tego paska narzędzi, aby wygenerować Navmesh automatycznie, musimy jednak być w trybie Navmesh i pojawienie się tego paska oznacza, że właśnie w takim trybie pracujemy.
Są cztery rodzaje automatycznego generowania: Object Based, Havok Based, Recast Based, oraz Zaawansowany. W przypadku większości komórek wnętrz Interior wystarczy użyć Recast Based i potem ręcznie poprawić Navmesh. W tym poradniku nie będziemy omawiać pozostałych rodzajów. Niektórzy użytkownicy preferują ręczne tworzenie, twierdząc iż jest szybsze, ponieważ nie trzeba wtedy dodatkowo ręcznie nanosić wielu poprawek. Gdy już poznasz zasady tworzenia Navmesh, które za chwilę omówimy, możesz wybrać metodę, którą uznasz za lepszą.

Dla użytkowników znających Navmesh z GECK tryby Object Based oraz Recast Based są całkowicie nowe, stworzono je specjalnie dla Creation Engine.
Sprawdźmy jak działa generowanie Recast:
- Kliknij na okno Render, aby upewnić się, że jest aktywne.
- W oknie Render żaden obiekt nie może być zaznaczony (jeśli nie masz do tego pewności, kliknij gdzieś na pusty obszar lub naciśnij klawisz D).
- Wybierz Recast Based Generation z menu Navmesh na głównym pasku narzędzi edytora: Navmesh > Generation > Recast Based Generation.
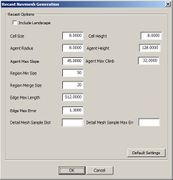
- Otworzy się okno Recast Navmesh Generation. (rysunek 4.3)
- Nie przejmuj się co oznaczają te wszystkie wartości. Powinny być podobne jak pokazano na rysunku 4.3.
- Kliknij na "OK". Generowanie może zająć chwilę, zależnie jaki posiadasz komputer.
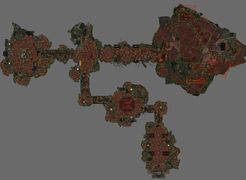
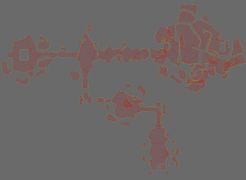
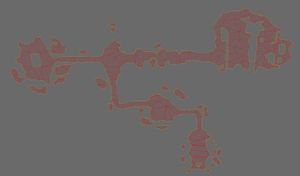
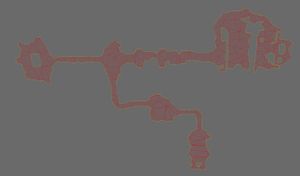
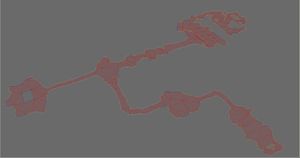
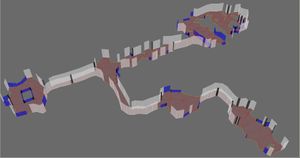
- Po zakończeniu Navmesh powinna wyglądać podobnie jak na rysunkach 4.4 oraz 4.5.
Now that we have a navmesh created, we need to spend some time cleaning it up. The easiest and fastest way to do this is by hand. Before we begin the clean up process, take a minute to look at your navmesh and see where Recast Based generation didn't do so well.
If you're having trouble seeing your navmesh you can try one of the three Navmesh modes: Normal, Transparent, Navmesh Only. Press "W" to cycle through the three different modes, or use the toolbar buttons, pictured here:
![]()
When cleaning up automatically-generated navmesh, it's often best to begin by eliminating unnecessary segments of navmesh that have been placed on non-reachable areas. This will make it easier for us to see what's going on with the remaining navmesh afterward.
The Cave area and the stairs of the Nordic Ruins seem to be the biggest offenders. You will also see a lot of navmesh islands. Don't worry about these for now. Once we have cleaned up the main navmesh, removing the islands is fast and easy.
Begin by taking care of the cave section first. Then, we'll clean up the rest of the navmesh. For now, you'll only need to know about the three buttons on the far left of the navmesh toolbar:
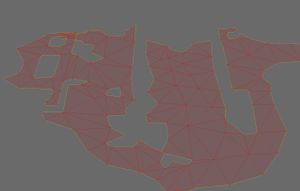
To clean up the cave section, Left Click and Drag Select the vertices in the cave section. Remember to toggle visibility ("W") to get your bearings. Don't worry about trying to preserve any of the navmesh in the cave area: we'll rebuild it later. Be sure that you have Select Vertex (Fig 4.7) and/or Select Triangle (Fig4.6) toggled on. You can clean up the cave section by selecting the vertices or triangles or both. Fig 4.9a shows the navmesh with all vertices and triangles (or "verts and tris", for short) in the cave area selected and ready for deletion.
Once you've selected the Triangles and/or Vertices you wish to delete, press either "R" or "del" to delete the selection. With the cave section removed, your navmesh should look similar to that shown in Fig 4.9b.
It's time now to create the navmesh in the cave section by hand.

As you create and edit more and more navmeshes you will want to begin using Navmesh hotkeys instead of using the toolbar. T toggles Triangle Selection On/Off
V toggles Vertex Selection On/Off
G toggles Edge Selection On/Off
Toggle Vertex Selection on by either clicking the ![]() button in the navmesh toolbar or by using hotkey "V" and zoom into the beginning of the cave section. Right Click on the floor. Notice a vertex has appeared. Now create two more vertices the same way. You should see something like Fig 4.10 - three yellow (or two yellow and one green) vertices on the floor.
button in the navmesh toolbar or by using hotkey "V" and zoom into the beginning of the cave section. Right Click on the floor. Notice a vertex has appeared. Now create two more vertices the same way. You should see something like Fig 4.10 - three yellow (or two yellow and one green) vertices on the floor.

Navmesh editing uses a separate set of hotkeys than regular Creation Kit editing. Some hotkeys you may be accustomed to, such as "T" for top-down viewing, are re-bound to new keys while editing navmesh mode. You may wish to print and refer to the Navmesh Cheat Sheet while getting used to this mode.
Notice the colors of the vertices you've created. Green indicates that a vertex is currently selected. Yellow vertices are unselected and disconnected - not part of any triangle. Vertices that are unselected and part of a triangle render Red. Yellow vertices serve no purpose and can be safely deleted if any are left hanging around a complete navmesh.
To create a Triangle, select all three of your disconnected, yellow verts by using CTRL+Left Click on each vertex - or simply Drag Select all three at once. The selected vertices will turn green to show that they are selected. Press "A" or use ![]() to create a triangle from the three vertices, as in Fig 4.11. Note that "A" only works when exactly three verts are selected.
to create a triangle from the three vertices, as in Fig 4.11. Note that "A" only works when exactly three verts are selected.
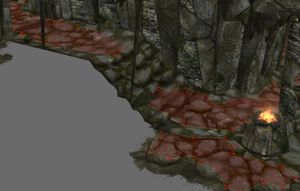
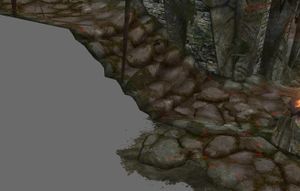
Now that we have our first triangle, we need to fill up the rest of the cave section with other triangles. The easiest way to do this is to select two vertices and ctrl+Right-Click to place a third vertex. This will automatically create a new triangle between the two selected vertices and the newly-placed one.
Notice that once the new triangle is created, two vertices remain selected/green. Simply use ctrl+Right-Click to create another triangle. With practice, you can get into a rhythm and be able to fill up spaces quickly just by holding CTRL and Right Clicking. If the two green vertices aren't the two you need to create your next triangle, simply press "Tab" to swap selected vertices. Go ahead and fill up the rest of the cave section. Once your done, your cave section navmesh should look similar to Fig 4.12 and 4.13 below.
(Note: your results may vary depending on how much your clutter matches that in the example file)
Before we move on to navmeshing the rest of the cell, let's look at the nordic stairs, NorHallSm1wayStairs128. Stairs are a typical problem area when using automatic generation. Your navmesh is probably disconnected here, as shown in Fig 4.14a.
Luckily, the Creation Kit makes it easy to quickly join disconnected navmesh like this.
For this example, we want a clean edge at the top and bottom of the stairs. Follow these steps:
- Delete any vertices on the staircase itself, if applicable.
- Re-arrange the vertices at the top and the bottom of the staircase, creating a clean, open edge at each side.
- If either edge has three or more vertices at the top of the stairs, merge some of the vertices so there are only two remaining. - To merge vertices, select which ones you want to merge and press "Q" or
 on the toolbar.
 - Make sure edge selection is toggled on ("G")
- Double-click one of the edges. Double-clicking an edge selects the two vertices on that edge - they will turn green to indicate this.
- With the two vertices selected, hold CTRL and double-click the other edge. Navmesh is automatically generated to join the edges. Your result should look similar to Fig 4.14b below.
With the cave section navmeshed and the stairs connected you now know the essentials and are equipped to continue navmeshing the rest of the cell. Go ahead and navmesh the rest of the cell and if you run into any problems, the following pointers may come in handy.
- Focus on a clean, simple navmesh. This will be easier to edit and run faster in-game.
- Remember your hotkeys! Keep the Navmesh Cheat Sheet handy while learning.
- Don't bother creating navmesh in areas that AI won't be able to use anyway, such as narrow areas between furniture. Pathing Tests can be used to test this.
- Remember: to automatically create navmesh between two nearby, open edges: Double-Left Click one edge, then CTRL+Double-Left Click the other edge.
- Take advantage of the multiple view modes. To cycle through, press "W" or use the toolbar buttons

- To delete a triangle, toggle "T", select the offending triangle and press DELETE or R. You can also undo a change you've made with CTRL-Z.
- Deleting any vertex will delete all triangles and edges of which it was a part.
- Remember the hotkeys for toggling Triangle, Vertex, and Edge Selection. (T, V, G respectively).
- To merge vertices, select two or more and press Q or
 The vertices will merge to the first selected vertex.
 - Double-Click an edge (with Edge Selection turned on, "G") to quickly select its two vertices.
- Remember how two vertices remain selected after creating a triangle? You can cycle through which two vertices you want selected by pressing "TAB".
- You can press "R" to delete selected objects if you don't want to reach across your keyboard and hit the DELETE key.
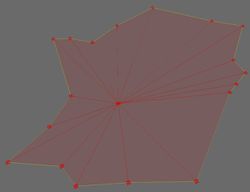
- Strive to create "fat" triangles - as close to equilateral as possible. These are much more efficient. Thin, "skinny" triangles are to be avoided. Use edge-rotating with hotkey "S" or
 to achieve a more ideal result, as picture in Fig 4.15s before & after example.
 - If you have what looks like a connected navmesh, but you see a yellow edge, this just means there are two vertices overlapping each other. To fix, drag select over the vertices and merge them together ("Q"). If the yellow edge remains, do the same thing on the vertices on the other side of the edge. If the yellow edge disappears, you have merged the vertices and have connected your navmesh.
- Right-Click on an edge to create a vertex on that edge. This is called splitting an edge.
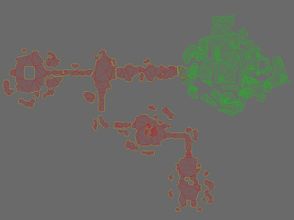
Fig 4.17 shows approximately what your navmesh should look like after you're done. In this example, we've left the small, isolated navmesh "islands". These can easily be deleted.
- Select any triangle in your main navmesh and press "I" or

- This is called inverse flood fill and selects all navmeshes not in the selection. Assuming your playable area consists of a single, contiguous navmesh, all the area now highlighted green are unnecessary.
- With the islands selected, delete them with "R" or "DELETE".
- Your final navmesh should look similar to that in Fig 4.18.
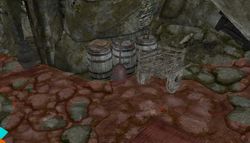
Here is what the navmesh should look like near the cluttered areas of the level. Notice in Fig 4.16 that the navmesh goes under physics-enabled (moveable/dynamic) objects. You never need to navmesh around a Havok object, the navmesh takes care of it during run-time. In the example below, the Havok objects in the scene are the shovel, wooden cart, and ceramic pot. Notice the navmesh goes underneath these objects. The wooden barrels are not Havok objects and therefore we need to navmesh around them.
You need to always check your navmesh for errors after you're done navmeshing a cell. This is a relatively simple process.
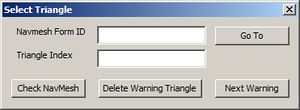
- Bring up the Select Triangle by Index dialog pictured in fig 4.18. There are three ways to do this:
- Once this dialog is up, select "Check Navmesh".
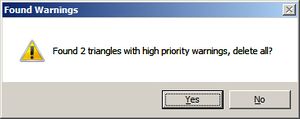
- A warning, shown in fig 4.19, pops up showing how many triangles were found (if any) and asks if you want to delete all of them.
- Next, deal with the problem triangles. There are two approaches to this:
- Choosing "Yes" will delete all of the problem triangles - but you'll have to go in and find where these triangles were located and patch them up (usually by creating a new triangle). You won't have any way to find these triangles except by eye, which can be difficult with complex navmesh, especially if the offending triangles were small or overlapped.
- We recommend you fix each error by hand, in which case you can select "No" to bypass. This will close the warnings dialog.
- Select Next Warning in the Select Triangle dialog. The render window camera will automatically snap to the problem triangle and highlight it for you. Most errors are easily solved by deleting the problem triangle and rebuilding.
- If you have more than one warning, select Check Navmesh once again and repeat the process until all problem triangles have been corrected. (You have to re-check between each deletion because the index of navmesh triangles is affected when you correct each error.)
- When you've finished, save your plugin again.
Create Cover Edges
Cover edges store data such as the height of a piece of cover, which NPCs use in combat and during regular pathfinding.
- To automatically detect cover, navigate to Navmesh > Find Cover from the Main Toolbar, or use the
 button in the Navmesh Toolbar.
 - Finding cover should take a small amount of time to process, depending on your hardware and the complexity of the navmesh.
- When done, you'll notice different colored edges in your navmesh. Each color represents different cover heights. The navmesh should look similar to that pictured in Fig 4.20 below after you've generated cover.
- To get a better visual of what kind of cover is in your level, simply navigate to Navmesh > Draw Cover (shown in Fig 4.21).
With navmesh complete, actors will be able to navigate the space. Building quality navmesh can be a time-consuming and, at times, tedious process - but the results of a bad navmesh are evident during gameplay.

Cover information isn't just used for ranged combat - it also determines where an AI will tend to go when fleeing from an enemy, for example. So it's a good idea to generate this information, even when it doesn't seem important.
Navmesh can hold more data than just cover - it's also possible to mark triangles as water, preferred, and edges as drop-down ledges. More information can be found here.
It is also possible to fine-tune cover data, although this level of detail isn't often necessary. To manually adjust cover data, select an edge and press "E". This will summon the "Edge Cover" dialog.
Here are a few pages you might want to reference during and after the tutorial, or in your further reading.
- Navmesh Overview - The Navmesh category has links to other topics regarding navmesh.
- Main Toolbar - Information on what the different icons on the Main Toolbar and Navmesh Toolbar and what they do.
- Navmesh Toolbar - Explains the buttons in the Navmesh Toolbar.
- Navmesh Cheat Sheet - Useful Hotkeys while in navmesh editing. Good to print out and keep handy while learning.
A solid navmesh provides the foundation needed to set up good NPC and combat gameplay. In the next tutorial we'll deal with just that.
Known Issue
There is currently an issue causing navmeshes in .ESPs to stop working if you travel a few cells away from where they are placed. NPCs stop moving and will not resume until the game is restarted. This issue is being addressed, and a fix is in the works.
| Powrót do spisu poradników | Następny poradnik | ||
| Language: | English |
|---|
