Creating a Merchant
To create a Merchant, follow these steps:
Create a Container[edit | edit source]
(and name it)
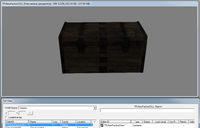
This is easier if you make a new instance (a custom copy) of an existing container, then remove everything from it (so you don't have to set up the model and sounds). Any of the chests starting with "Merchant..." are good ones to copy.
- Add any items you want the merchant to sell to the container. It's a good idea to use leveled lists rather than specific items, to give some variation to what the player is offered on each visit.
- To give the merchant gold you should add one of the VendorGold<> leveled items to the merchant container.
- You can also add gold to the merchants' own inventory if you want them to have a specific amount.
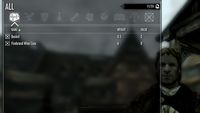
- You should also add the PerkMasterTraderGold leveled item so that players with the master trader perk have access to their bonus bartering gold.
NOTE: Maximum gold value for a merchant is 32767(7FFF in hex) before glitches will occur in where you will sell an item to a merchant, they'll take it, and not provide any gold for it. VendorGold<> is a leveled item, so if you set it at max at lvl 1, at lvl 2 glitches will occur.
Add the Container to the world[edit | edit source]
- Drag the container you made in the previous step into the render window, in the area your merchant will be trading.
- It's a good idea to put the container somewhere the player cannot get to it (for example, outside the playable area of an interior cell or under the ground).
Create a Faction[edit | edit source]
(and name it)
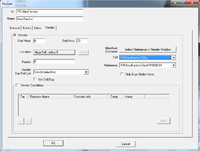
- Check "Vendor"
- Enter your daily start and end hours for the merchant
- If you don't add a start and end time, the merchant wont offer services.
- Select a location for the merchant to offer their goods (for example, the shop cell). You can select "Near Self" to make the merchant sell anywhere.
- Enter a Radius if the merchant needs to be within a certain distance of a reference.
- Select the container that you placed ingame as the Merchant Container.
- Select the type of goods the merchant will buy and sell from the Buy/Sell List drop-down menu (eg, VendorItemsApothecary or VendorItemsFletcher. These types are simple FormList objects containing keywords. You can also create your own. If you select "Not Buy/Sell", the type will be negated, and the merchant will buy and sell only items not matching the type. This can be useful, for example, if you are creating a merchant that will buy almost anything - just use VendorItemsMisc and check Not Buy/Sell. This is the configuration used by the pawnbroker Belethor in Whiterun.
NOTE: Regardless of the contents of the container, the merchant will only sell items matching her configured type filter.
Create an Actor[edit | edit source]
(and name it, set up their clothes/race/etc the way you want them)
- Give the Actor a common voice type (such as FemaleNord or MaleDarkElf) - This is needed to give them dialogue to run a shop.
- Please note that not EVERY voice type supports the merchant dialogue, and if you have everything else right and it's still not working, check to make sure you have the right voice type.
- Add the Faction "JobMerchantFaction" to the Actor's Faction list.
- Add the new faction you created to the Actor's Faction list.
Add the Actor to the game world, where you want them to be[edit | edit source]
If done correctly, your merchant should now sell the goods from the container when in the correct location at the correct time.
All that remains are any finishing touches you want to add to your merchant (AI Packages, extra dialogue, etc).


