Difference between revisions of "Fallout 4 Simple Fetch Quest Tutorial Chapter 11: Creating Dialog (Middle)"
imported>Ravelabenergy (Created page with "Category:Tutorials Category:New Users {{Tutorial Index |series=Fallout4 Scripting Quest Tutorial |chapter=11: Creating Dialog (Middle) |Prev=Fallout_4_Simple_Fetch_Que...") |
imported>Ravelabenergy |
||
| (2 intermediate revisions by the same user not shown) | |||
| Line 2: | Line 2: | ||
[[Category:New Users]] | [[Category:New Users]] | ||
{{Tutorial Index | {{Tutorial Index | ||
|series= | |series=Fallout 4 Scripting Quest Tutorial | ||
|chapter=11: Creating Dialog (Middle) | |chapter=11: Creating Dialog (Middle) | ||
|Prev= | |Prev=Fallout_4_Simple_Fetch_Quest_Tutorial_Chapter_10:_Quest_Accept | ||
|Next=Fallout_4_Simple_Fetch_Quest_Tutorial_Chapter_12:_Scripting_Artifact_Retrieval | |Next=Fallout_4_Simple_Fetch_Quest_Tutorial_Chapter_12:_Scripting_Artifact_Retrieval | ||
}} | }} | ||
'''Note: This tutorial | '''Note: This tutorial is written in Action-Reaction style''' — Headers are the '''action''' you have to do, and the pictures that follow depict the '''reaction''' (or result) of the Creation Kit. | ||
=Start up your Mod in the GECK= | |||
*Open up your Quest | |||
*Select the Scenes tab | |||
Note: This is only if the GECK isn’t running. | |||
A condition is a check to see if certain parameters have been met. For example: | |||
If condition A has been met then B occurs. | |||
If condition A hasn’t been met then C occurs. | |||
So having accepted the quest, we need to add a scene of dialog that occurs when the player encounters the NPC but DOES NOT have the object the quest calls for.. | |||
[[image:Picture11-1.png]] | |||
=Right-Click over the EditorID panel= | |||
[[image:Picture11-2.png]] | |||
=Select New= | |||
The quest ID is shown as a prefix. Don’t use that as a scene ID, do the next step | |||
[[image:Picture11-3.png]] | |||
=Append NN to the text= | |||
Where NN is the number of the scene. I used 02 because 01 was the greeting scene. | |||
[[image:Picture11-4.png]] | |||
=Click OK= | |||
Note the scene name appears in the EditorID. | |||
[[image:Picture11-5.png]] | |||
=Click on the scene name= | |||
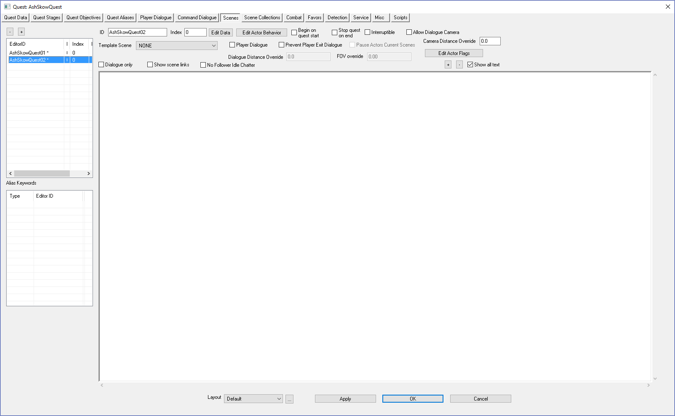
Note that the ID text box fills in with your scene name: AshSkowQuest02 | |||
[[image:Picture11-6.png]] | |||
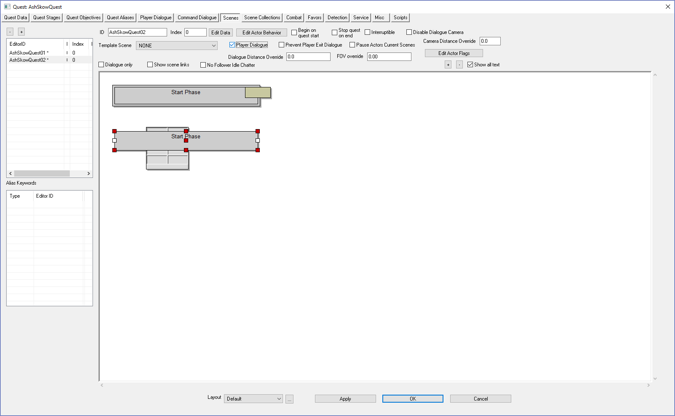
=Click on the Player Dialogue checkbox= | |||
[[image:Picture11-7.png]] | |||
=Right-click anywhere in the white area= | |||
[[image:Picture11-8.png]] | |||
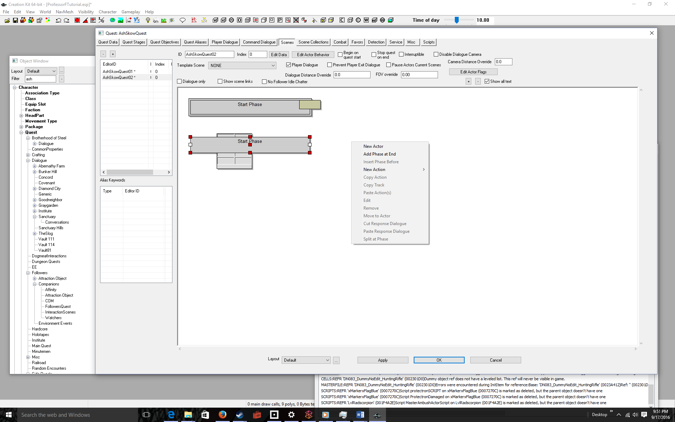
=Select New Actor= | |||
[[image:Picture11-9.png]] | |||
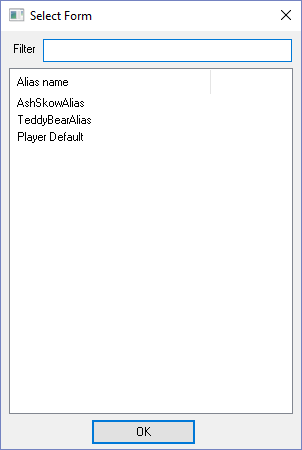
=Click on your NPC alias (AshSkowAlias) then click the OK button= | |||
[[image:Picture11-10.png]] | |||
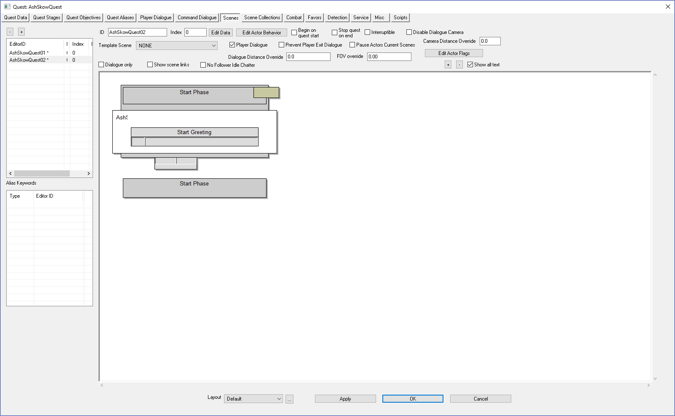
=Double-click the empty gray box underneath Start Greeting!!!= | |||
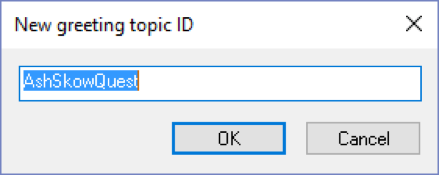
The Quest ID is prefixed, but don’t you dare click OK! Go on to next step. | |||
[[image:Picture11-11.png]] | |||
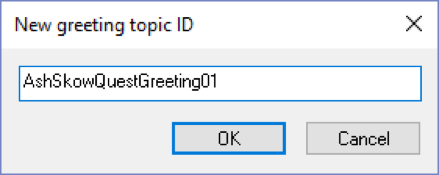
=Append GreetingNN!!!= | |||
Where NN is some unique greeting number like 01 | |||
[[image:Picture11-12.png]] | |||
=Click the OK button= | |||
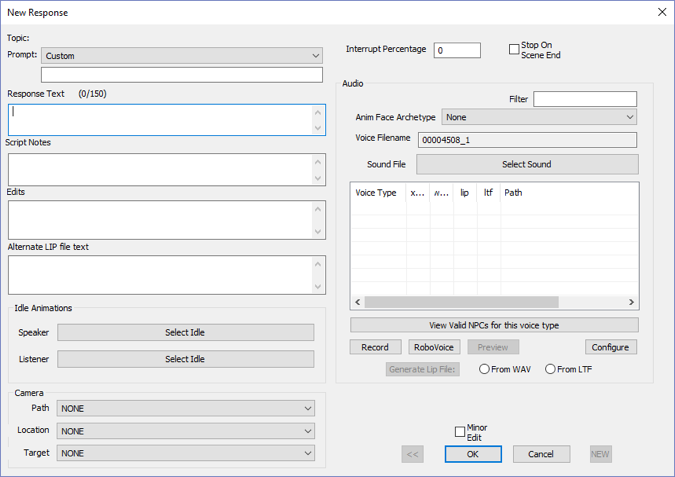
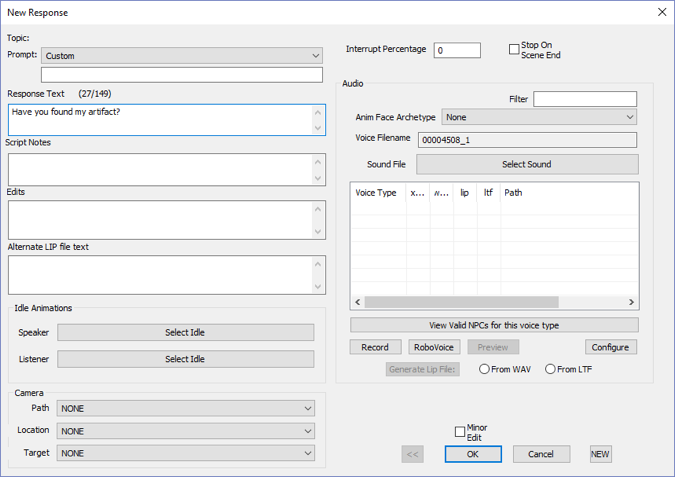
There are many inputs here, but the only one that matters is the Response Text. This is the greeting the player will see when initiating a dialogue with the NPC. | |||
[[image:Picture11-13.png]] | |||
=Type a greeting into the Response Text box= | |||
Since the player has agreed to the quest and is in the retrieve part of the quest (but hasn’t found the artifact yet) a good example is: “Have you found my artifact?” | |||
Again, this is what the player will see when talking to the character, or when the player goes in range. | |||
[[image:Picture11-14.png]] | |||
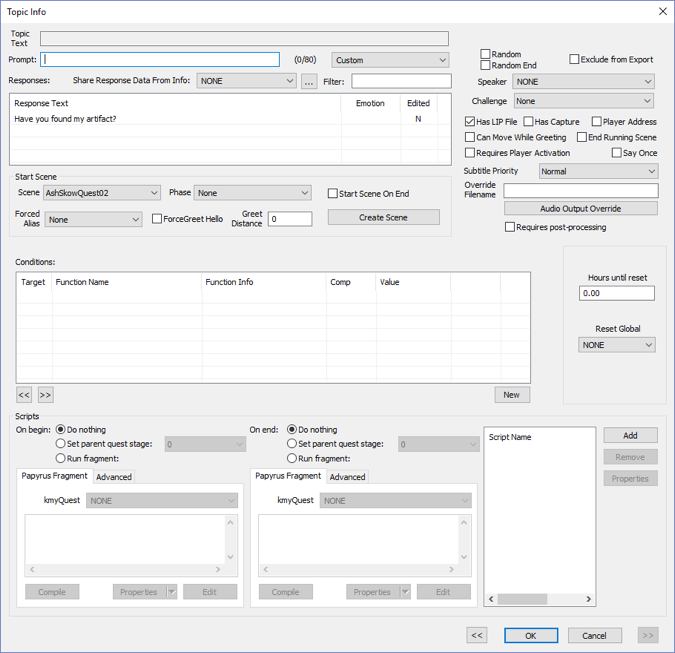
=Click the OK button= | |||
Note: the Response Text is filled with your greeting. This pop-up also allows you to change many options when we start scripting the quest—like when the greeting appears. But for now, we can ignore most of what’s in this box. | |||
[[image:Picture11-15.png]] | |||
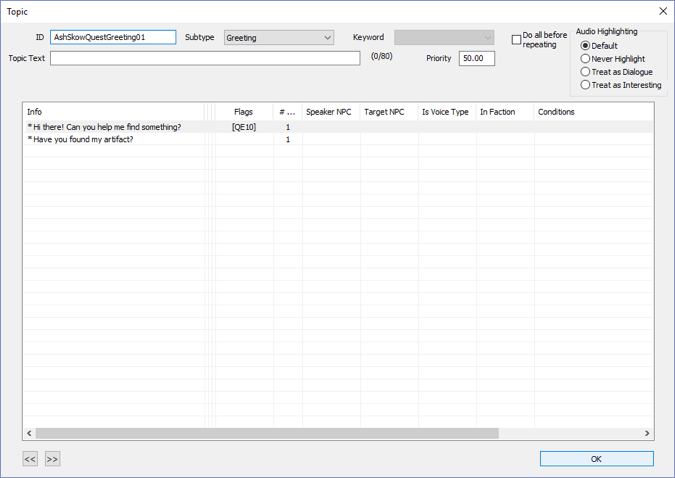
=Click the OK button again= | |||
Another dialog box pops up allowing you to change options. Again, you don’t need to mess with these. | |||
[[image:Picture11-16.png]] | |||
=Click the OK button= | |||
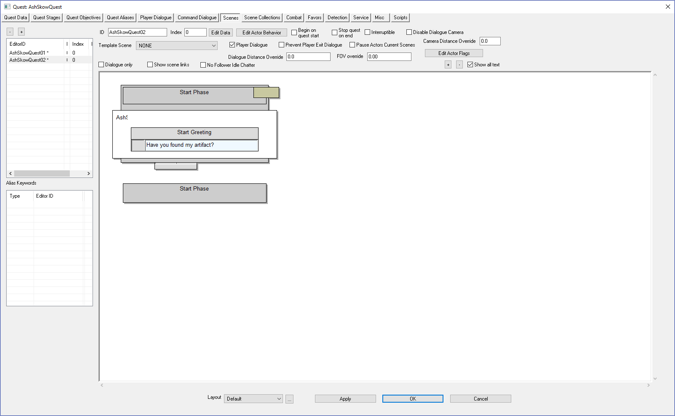
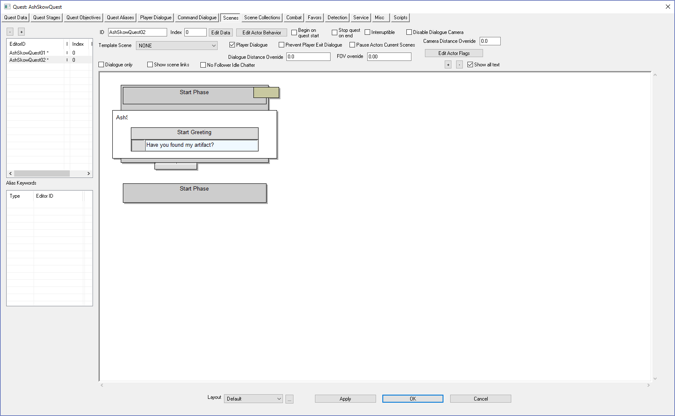
Finally we’re back to the main scene window. | |||
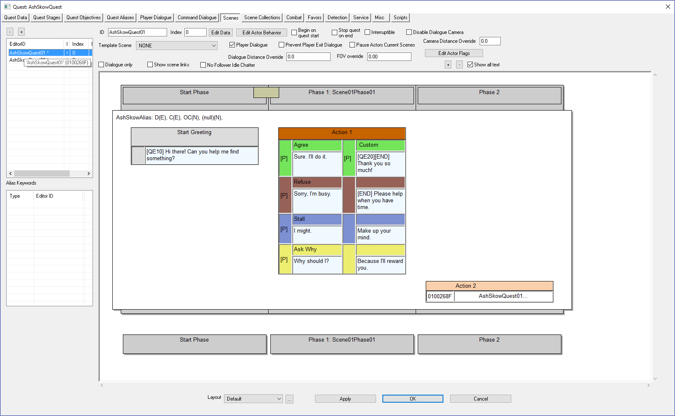
Remember: the Start Greeting is what the player will see when he or she first engages the NPC (usually by selecting the Talk option) | |||
But now we have a problem. How does Fallout 4 know which greeting to run? The answer is it will always run the Quest01 greeting unless you set conditions | |||
START: PROCEDURE FOR SETTING SCENE CONDITIONS | |||
[[image:Picture11-17.png]] | |||
=Click on the EditorID of the first scene= | |||
This is the general method for setting dialog conditions. You’ll beginby clicking on a scene in the EditorID panel. For this tutorial that’ll be: AshSkowQuest01 | |||
[[image:Picture11-18.png]] | |||
=Double-Click the blue area of the Start Greeting= | |||
The Topic Info window is where you set the conditions for displaying a scene | |||
[[image:Picture11-19.png]] | |||
=Click the New button to create a new condition= | |||
[[image:Picture11-20.png]] | |||
=Select GetStage in the Condition Function drop-down= | |||
Pro-tip: Typing GetStage allows you to find the function faster. | |||
[[image:Picture11-21.png]] | |||
=Set the Comparison drop-down to < and Value to Meet Quest Stage Index (20)= | |||
This will scene will run until the player agrees which will set Quest Stage = 20 | |||
[[image:Picture11-22.png]] | |||
=Click OK= | |||
To be safe, you’ll want to add one more condition that the greeting is only said by Ash Skow. | |||
[[image:Picture11-23.png]] | |||
=Click the New button to create a new condition= | |||
[[image:Picture11-24.png]] | |||
=Click on INVALID= | |||
[[image:Picture11-25.png]] | |||
=In the drop-down, select AshSkow= | |||
Pro-Tip: By typing AshSkow after clicking on the drop-down, you can easilyfind the NPC. | |||
[[image:Picture11-26.png]] | |||
=Click OK= | |||
[[image:Picture11-27.png]] | |||
=Click OK= | |||
[[image:Picture11-28.png]] | |||
=Click OK= | |||
END: PROCEDURE FOR SETTING SCENE CONDITIONS | |||
Next we’ll set the conditions for scene 02 | |||
[[image:Picture11-29.png]] | |||
=Click on the EditorID of the second scene= | |||
This is the general procedure for setting dialogue conditions. You’ll start by clicking on a scene in the EditorID panel, which in our case is AshSkowQuest02 | |||
[[image:Picture11-30.png]] | |||
=Double-Click the blue area of the Start Greeting= | |||
The Topic Info window is where you set conditions for displaying a scene | |||
[[image:Picture11-31.png]] | |||
=Click the New button to create a new condition= | |||
[[image:Picture11-32.png]] | |||
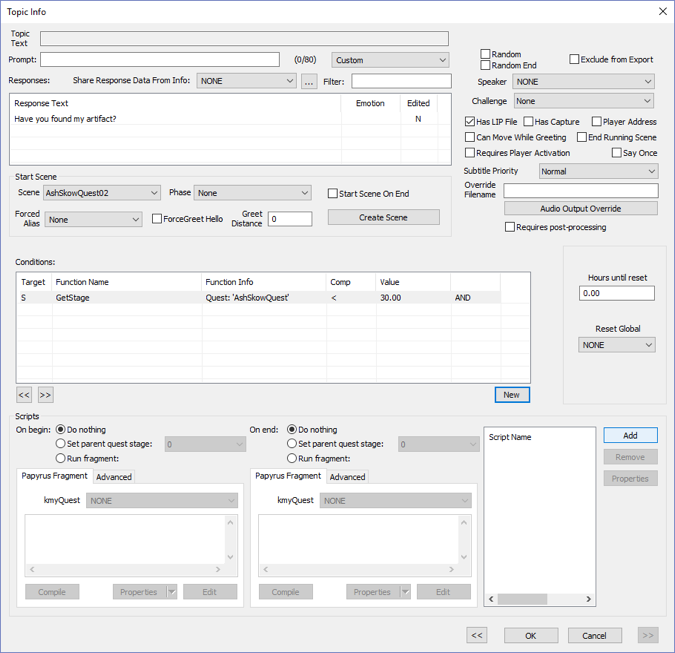
=Select GetStage, <, and Found Artifacts Quest Stage Index (30)= | |||
This scene will run until the player finds the artifacts— Quest Stage 30 | |||
[[image:Picture11-33.png]] | |||
=Click OK= | |||
Now let’s make sure only the NPC says this dialog, not our player. | |||
[[image:Picture11-34.png]] | |||
=Click the New button to create a new condition= | |||
[[image:Picture11-35.png]] | |||
=Click on INVALID= | |||
[[image:Picture11-36.png]] | |||
=In the drop-down, select AshSkow= | |||
Pro-Tip: By typing AshSkow after clicking on the drop-down, you can easily find the NPC. | |||
[[image:Picture11-37.png]] | |||
=Click OK= | |||
[[image:Picture11-38.png]] | |||
=Click OK= | |||
[[image:Picture11-39.png]] | |||
=Click OK= | |||
Now it’s finally time to test if the dialog displays properly. | |||
[[image:Picture11-40.png]] | |||
=Click OK= | |||
Select File > Save | |||
[[image:Picture11-41.png]] | |||
=Run Fallout 4, Go to Ash and Agree to the quest= | |||
[[image:Picture11-42.png]] | |||
=Test by walking away…= | |||
[[image:Picture11-43.png]] | |||
=… Then get close again. Repeat as many times as desired and enjoy the fruit of your labor.= | |||
[[image:Picture11-44.png]] | |||
Don’t forget to quit out of the game! (ALT-F4 for the PC Master Race) | |||
Latest revision as of 17:46, 17 April 2017
| Fallout 4 Simple Fetch Quest Tutorial Chapter 11: Creating Dialog (Middle) | |
|---|---|
| Fallout 4 Scripting Quest Tutorial Series, Chapter 11: Creating Dialog (Middle) | |
| Return to Tutorial Hub | |
| Next Tutorial | |
Note: This tutorial is written in Action-Reaction style — Headers are the action you have to do, and the pictures that follow depict the reaction (or result) of the Creation Kit.
Start up your Mod in the GECK[edit | edit source]
- Open up your Quest
- Select the Scenes tab
Note: This is only if the GECK isn’t running.
A condition is a check to see if certain parameters have been met. For example:
If condition A has been met then B occurs.
If condition A hasn’t been met then C occurs.
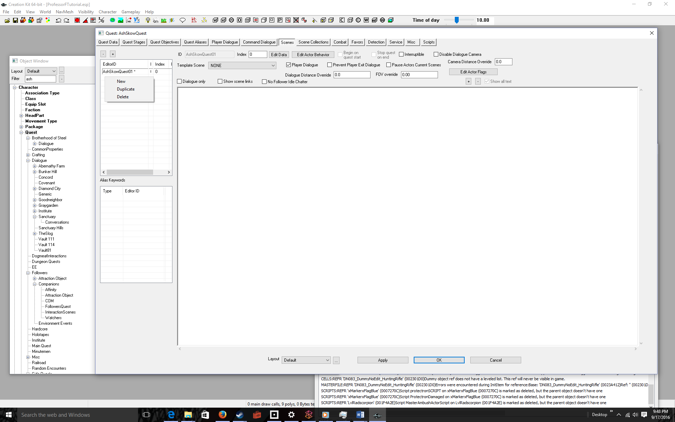
So having accepted the quest, we need to add a scene of dialog that occurs when the player encounters the NPC but DOES NOT have the object the quest calls for..
Right-Click over the EditorID panel[edit | edit source]
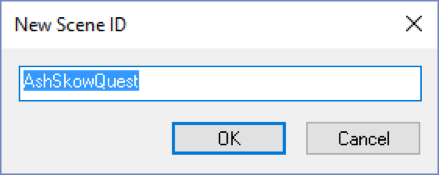
Select New[edit | edit source]
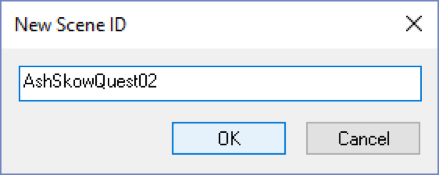
The quest ID is shown as a prefix. Don’t use that as a scene ID, do the next step
Append NN to the text[edit | edit source]
Where NN is the number of the scene. I used 02 because 01 was the greeting scene.
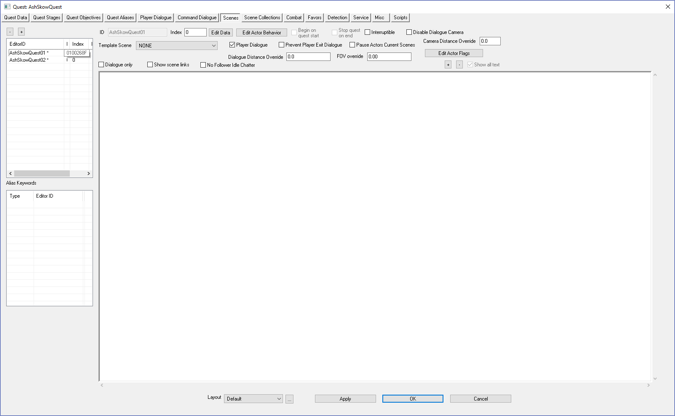
Click OK[edit | edit source]
Note the scene name appears in the EditorID.
Click on the scene name[edit | edit source]
Note that the ID text box fills in with your scene name: AshSkowQuest02
Click on the Player Dialogue checkbox[edit | edit source]
Right-click anywhere in the white area[edit | edit source]
Select New Actor[edit | edit source]
Click on your NPC alias (AshSkowAlias) then click the OK button[edit | edit source]
Double-click the empty gray box underneath Start Greeting!!![edit | edit source]
The Quest ID is prefixed, but don’t you dare click OK! Go on to next step.
Append GreetingNN!!![edit | edit source]
Where NN is some unique greeting number like 01
Click the OK button[edit | edit source]
There are many inputs here, but the only one that matters is the Response Text. This is the greeting the player will see when initiating a dialogue with the NPC.
Type a greeting into the Response Text box[edit | edit source]
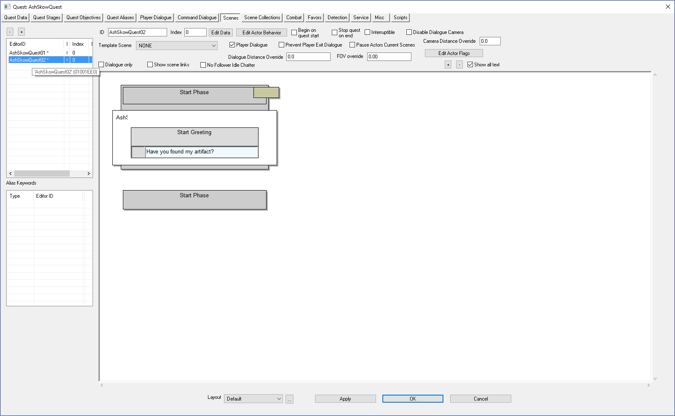
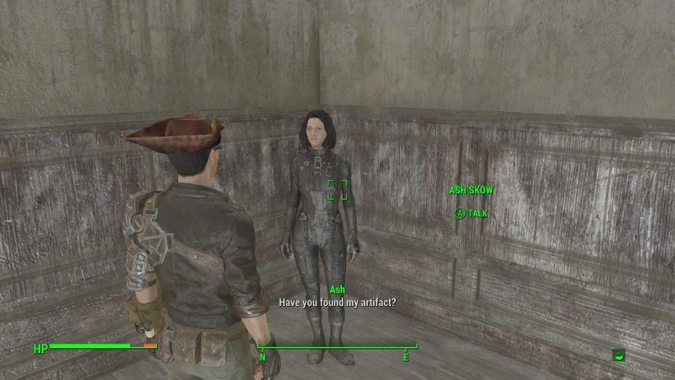
Since the player has agreed to the quest and is in the retrieve part of the quest (but hasn’t found the artifact yet) a good example is: “Have you found my artifact?”
Again, this is what the player will see when talking to the character, or when the player goes in range.
Click the OK button[edit | edit source]
Note: the Response Text is filled with your greeting. This pop-up also allows you to change many options when we start scripting the quest—like when the greeting appears. But for now, we can ignore most of what’s in this box.
Click the OK button again[edit | edit source]
Another dialog box pops up allowing you to change options. Again, you don’t need to mess with these.
Click the OK button[edit | edit source]
Finally we’re back to the main scene window.
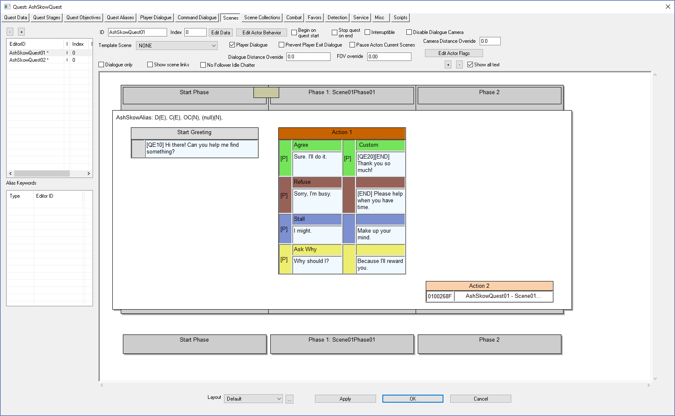
Remember: the Start Greeting is what the player will see when he or she first engages the NPC (usually by selecting the Talk option)
But now we have a problem. How does Fallout 4 know which greeting to run? The answer is it will always run the Quest01 greeting unless you set conditions
START: PROCEDURE FOR SETTING SCENE CONDITIONS
Click on the EditorID of the first scene[edit | edit source]
This is the general method for setting dialog conditions. You’ll beginby clicking on a scene in the EditorID panel. For this tutorial that’ll be: AshSkowQuest01
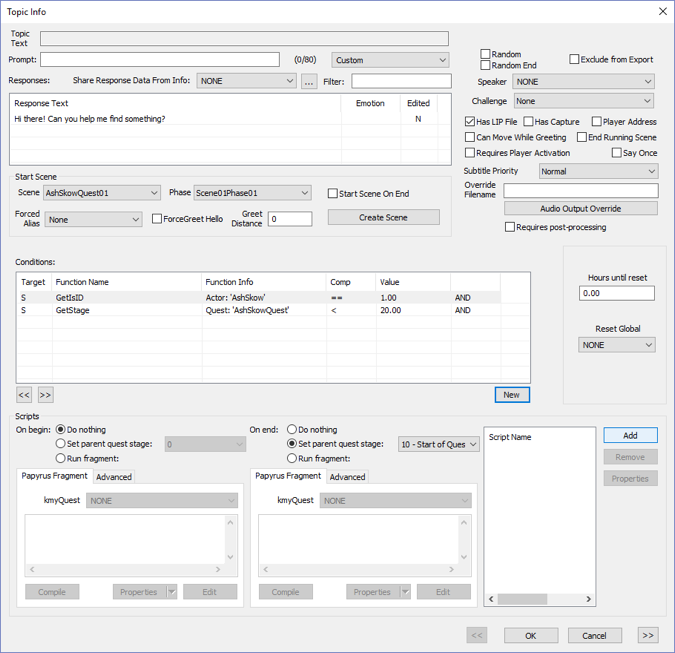
Double-Click the blue area of the Start Greeting[edit | edit source]
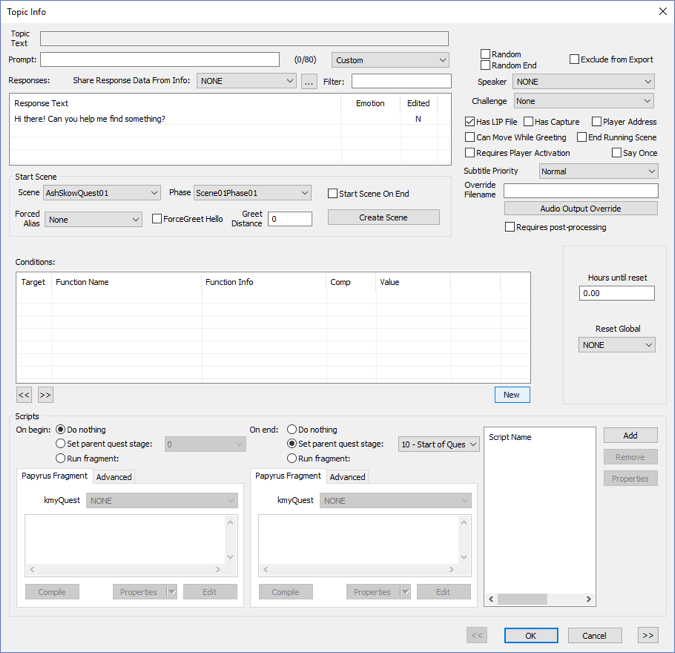
The Topic Info window is where you set the conditions for displaying a scene
Click the New button to create a new condition[edit | edit source]
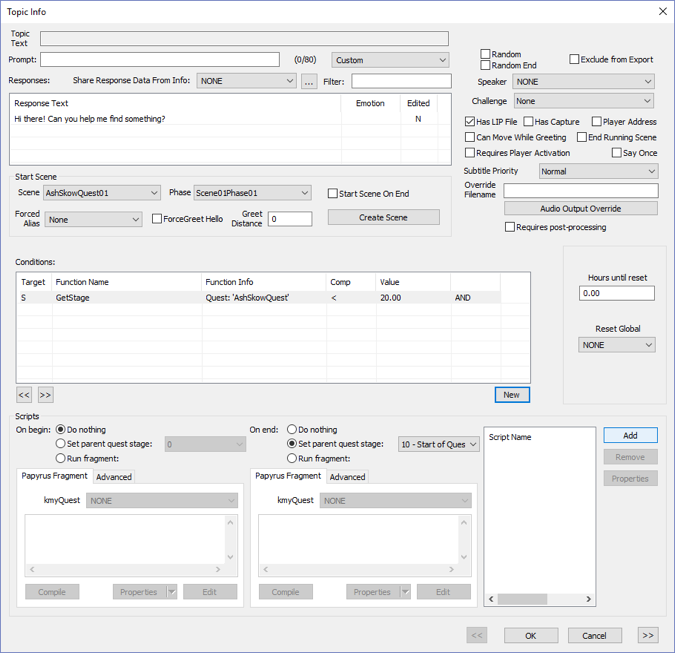
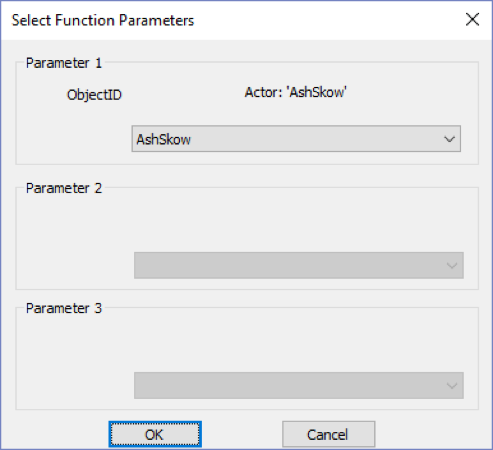
Select GetStage in the Condition Function drop-down[edit | edit source]
Pro-tip: Typing GetStage allows you to find the function faster.
Set the Comparison drop-down to < and Value to Meet Quest Stage Index (20)[edit | edit source]
This will scene will run until the player agrees which will set Quest Stage = 20
Click OK[edit | edit source]
To be safe, you’ll want to add one more condition that the greeting is only said by Ash Skow.
Click the New button to create a new condition[edit | edit source]
Click on INVALID[edit | edit source]
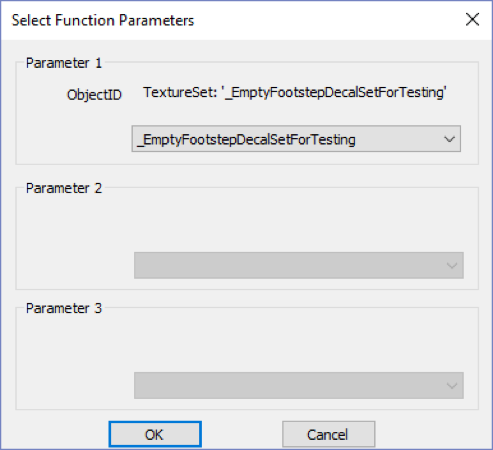
In the drop-down, select AshSkow[edit | edit source]
Pro-Tip: By typing AshSkow after clicking on the drop-down, you can easilyfind the NPC.
Click OK[edit | edit source]
Click OK[edit | edit source]
Click OK[edit | edit source]
END: PROCEDURE FOR SETTING SCENE CONDITIONS
Next we’ll set the conditions for scene 02
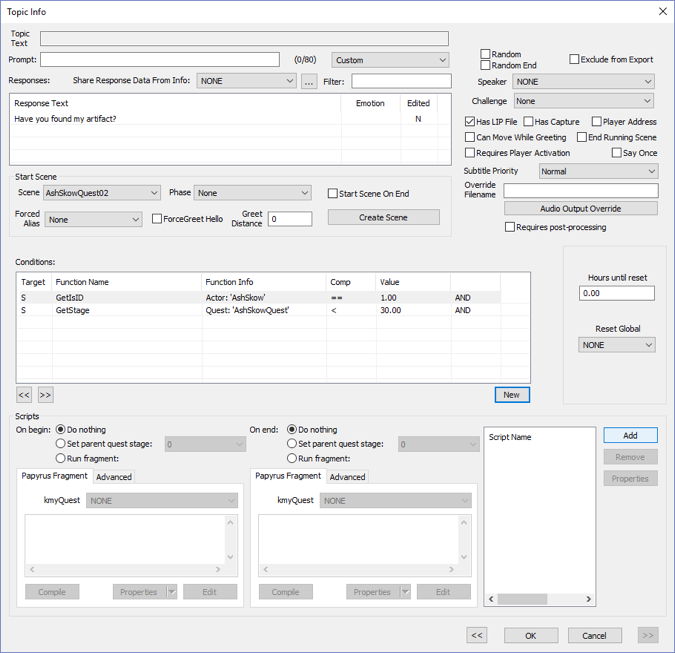
Click on the EditorID of the second scene[edit | edit source]
This is the general procedure for setting dialogue conditions. You’ll start by clicking on a scene in the EditorID panel, which in our case is AshSkowQuest02
Double-Click the blue area of the Start Greeting[edit | edit source]
The Topic Info window is where you set conditions for displaying a scene

Click the New button to create a new condition[edit | edit source]
Select GetStage, <, and Found Artifacts Quest Stage Index (30)[edit | edit source]
This scene will run until the player finds the artifacts— Quest Stage 30
Click OK[edit | edit source]
Now let’s make sure only the NPC says this dialog, not our player.
Click the New button to create a new condition[edit | edit source]
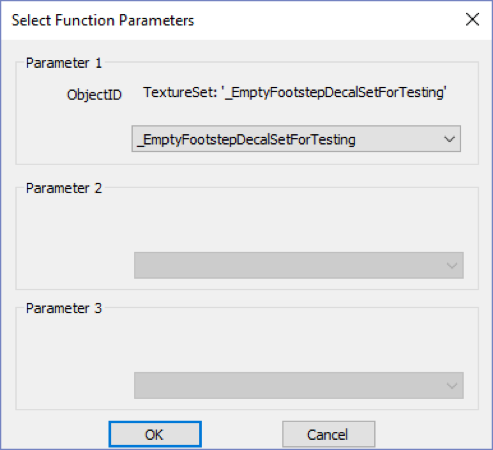
Click on INVALID[edit | edit source]
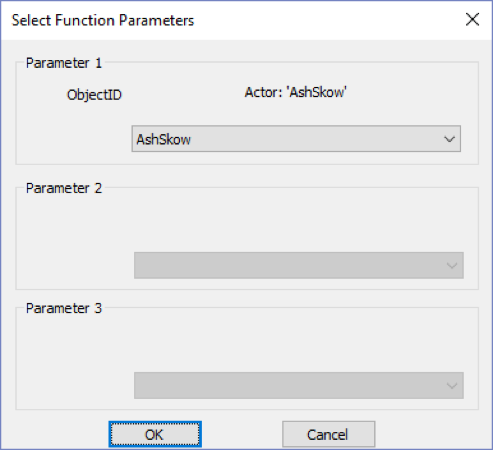
In the drop-down, select AshSkow[edit | edit source]
Pro-Tip: By typing AshSkow after clicking on the drop-down, you can easily find the NPC.
Click OK[edit | edit source]
Click OK[edit | edit source]
Click OK[edit | edit source]
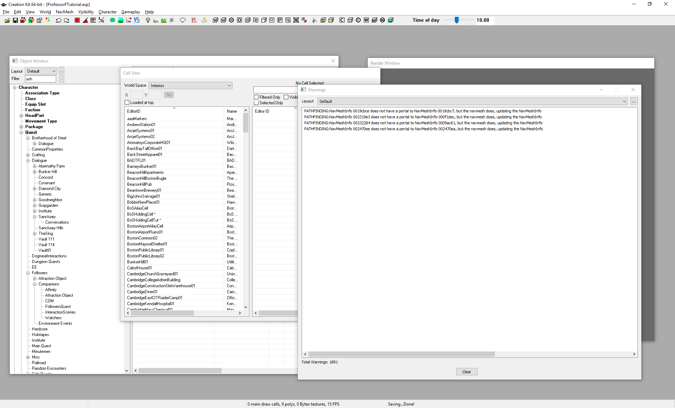
Now it’s finally time to test if the dialog displays properly.
Click OK[edit | edit source]
Select File > Save
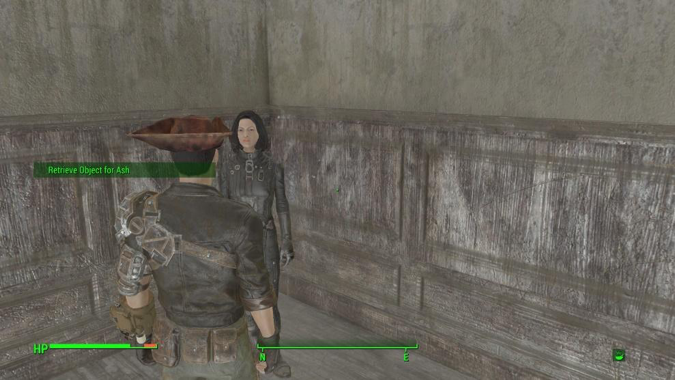
Run Fallout 4, Go to Ash and Agree to the quest[edit | edit source]
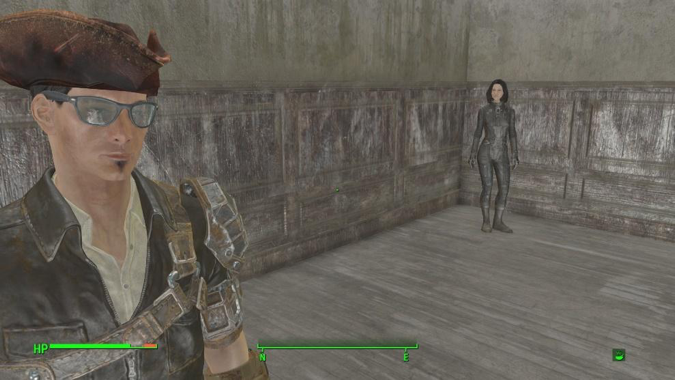
Test by walking away…[edit | edit source]
… Then get close again. Repeat as many times as desired and enjoy the fruit of your labor.[edit | edit source]
Don’t forget to quit out of the game! (ALT-F4 for the PC Master Race)

