Bethesda Tutorial Story Manager
| Bethesda Tutorial Story Manager | |
|---|---|
| Intermediate Quest Design Series, Chapter 6 | |
| Return to Tutorial Hub | |
| Next Tutorial | |
Overview[edit | edit source]
This chapter will explain the story manager and how it can be used to create new responsive content on the fly in an event-driven fashion.
The reader will learn:
- What the story manager is.
- The idea behind how it works.
- Nothing else -- there's no good way to make our existing tutorial content into something initiated by the story manager, so it's here that we're going to to leave the intrepid modder to explore.
Nodes On Top of Nodes On Top of Nodes On Top Of[edit | edit source]
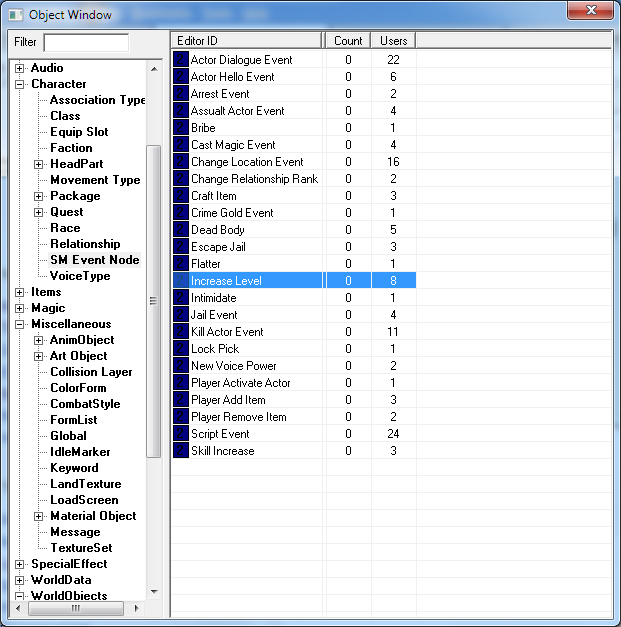
In the Object Window, under Character, navigate to the "SM Event Node" object type.
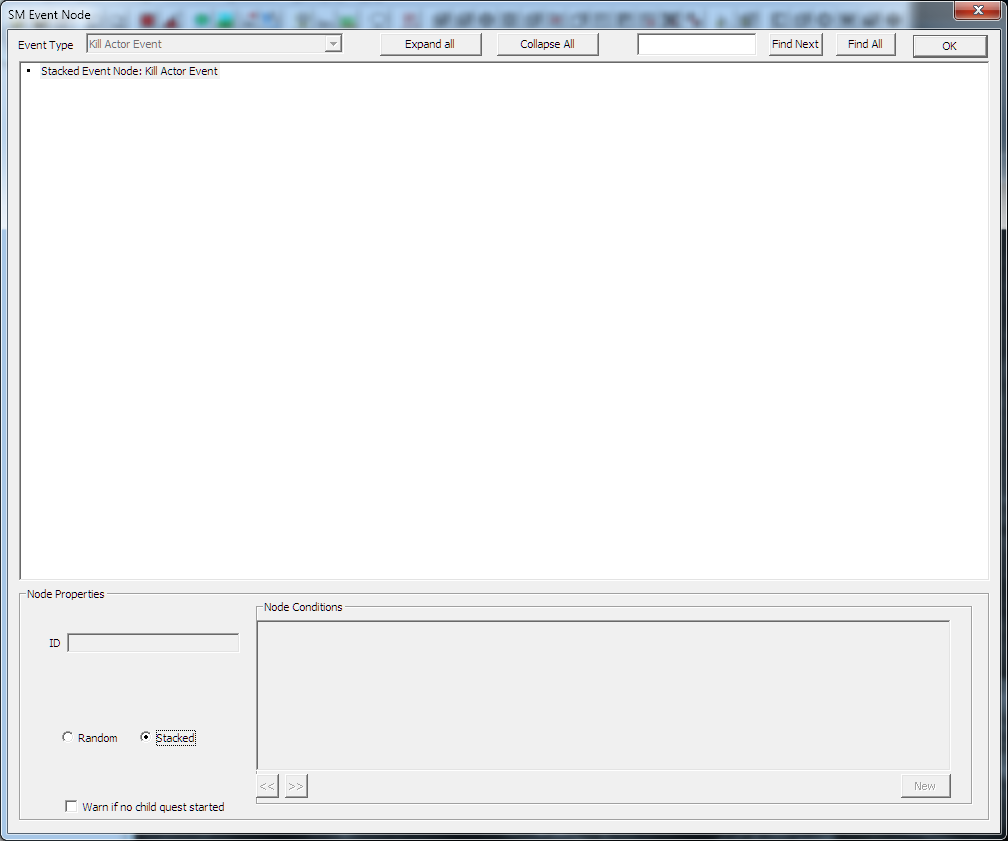
What you're looking at is the root set of events that can autonomously kick off radiant quests. They are fairly self-explanatory and very player-centric. Double click on the "Kill Actor Event" and try not to get scared.
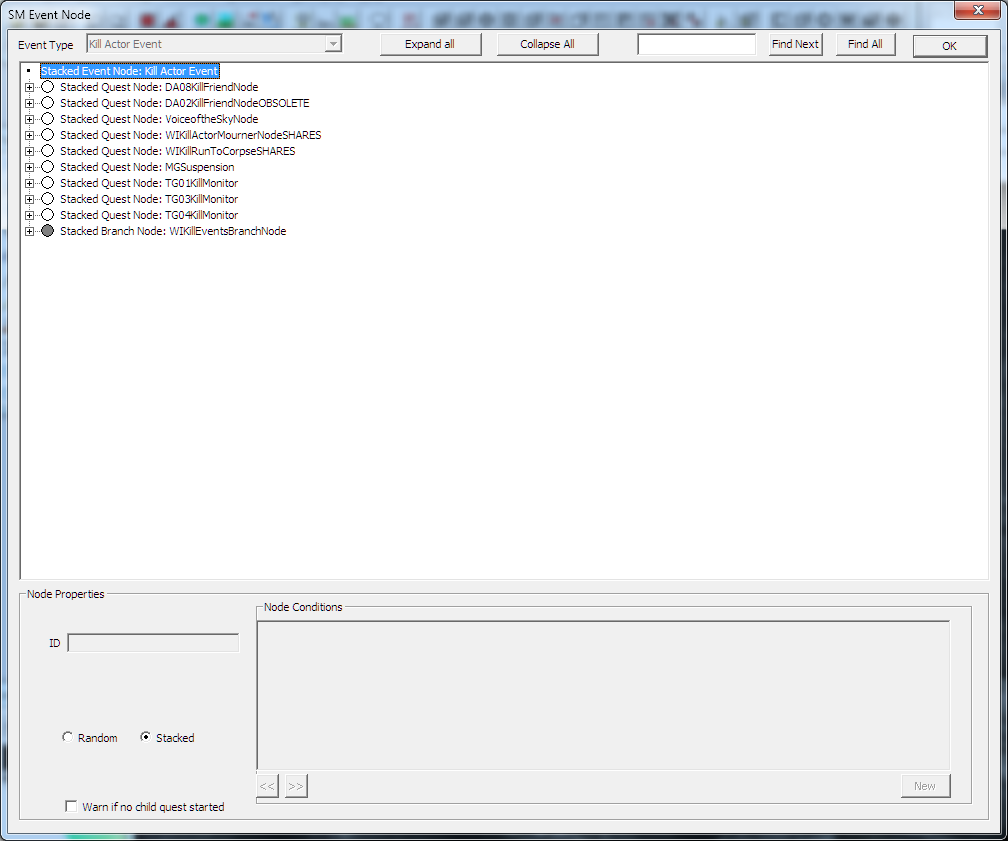
Ok, nothing too strange so far. Double-click where it says "Stacked Event Node: Kill Actor Event," start to behold the madness, and I'll explain.
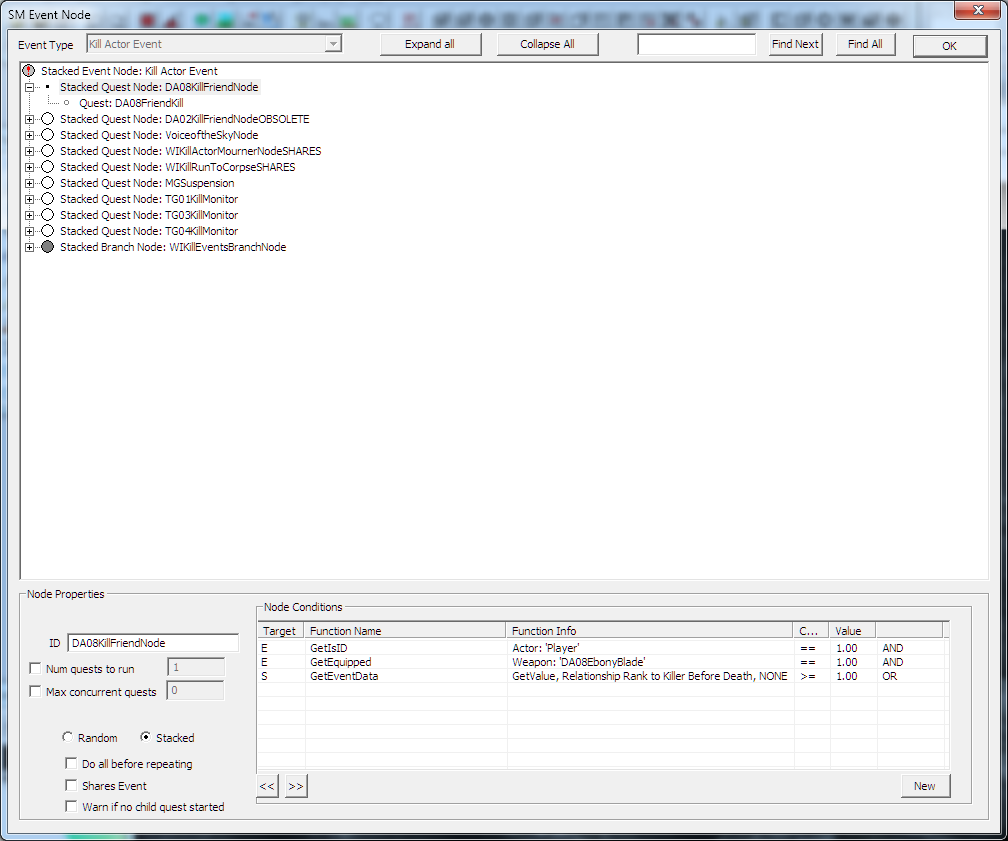
The story manager works on a system of nodes. Much like the package or info stacks you've already learned about, when a story manager event kicks off, it begins churning down this list from top to bottom. This is a new fold, though, because instead of just a straight up stack, we actually have a tree-like structure where each node can have its own logic that makes it valid or invalid. Click the plus-sign at the top of the tree to expand the node labeled "DA08KillFriendNode," then click on it to select it. You window should now look like this:
We're looking at the system the game uses to tell that the player has killed a friend with the Ebony Blade, as part of the post-quest activity for DA08. Note the conditions in the bottom right, and the "E" listed in the Target column. Double-click on the first condition to explore further.
Note that we now have the option of running this condition on "Event Data: Killer" -- this is a crucial concept. Each kind of story manager event defines its own set of event data that we can test with conditions. We're checking that the player is the one doing the killing, and that he is currently wielding the Ebony Blade.
There is so much data getting pumped through this system that it would be folly to try and explain it all here. You can explore the various events and their data in the story manager documentation.
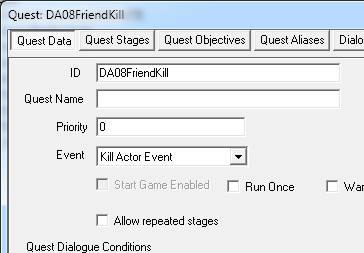
The important idea here is that this node has a quest attached to it -- if the node passes, the quest will be started. Note that not just any quest can be put into the story manager; it has to be specifically defined in its Quest Data tab as responding to an event.
The quest can then fill aliases from the event data, and thus do interesting things like respond to each event in a particular way. This is how children return the player's dropped items, how victims of theft will set bounties on the player, how mysterious benefactors will reward you for killing their enemies, etc.
On Top of Nodes On Top of[edit | edit source]
In addition to housing arbitrarily complicated quests, nodes can be nested to form complicated logical structures of event responses. There are two types of nodes: Branch nodes (which contain other nodes) and Quest nodes (which contain quests). Either one of these nodes can be either stacked (in which case the game churns through them from top to bottom) or random (in which case it will choose one of its child nodes randomly).
In almost all circumstances, you'll want to check the box for "Shares Event" on a node -- without this box, if a node actually manages to fire a quest, the event will not go through the rest of the tree, meaning unrelated nodes below you might not receive important notifications. So be a good Story Manager citizen, and share your events.
That's All Folks[edit | edit source]
If you've completed the Quest Design Fundamentals series and the Intermediate Quest Design series, you are now armed with a solid knowledge of how to make quest and radiant content with the Creation Kit. To get Bendu into an Story Manager Node visit here. If you're interested in exploring further, you may want to dive more into Papyrus, our new scripting language.
Good luck out there! Please make fantastic content, and share it! We always look forward to seeing what the community creates with these tools.
| Return to Tutorial Hub | Next Tutorial | ||
| Language: | English • français |
|---|
