Bethesda Tutorial Basic Quest Scripting
| Bethesda Tutorial Basic Quest Scripting | |
|---|---|
| Quest Design Fundamentals Series, Chapter 5 | |
| Return to Tutorial Hub | |
| Next Tutorial | |
Overview[edit | edit source]
This tutorial will show how to use scripting to advance the questline based on player actions. We previously showed how to script dialogue, but this will show how to attach arbitrary scripts to actors and game objects as well.
The reader will learn:
- The basic framework of how scripts work and attach to objects in the Creation Engine
- How to respond to events in the new scripting language
(For an even simpler introduction to scripting, see the "Hello, World" tutorial.)
Papyrus[edit | edit source]
The scripting language used by the Creation Kit is called Papyrus (after the material on which scrolls are printed). Papyrus scripts are normal text files that get turned into a bytecode that the game executes at runtime.

The new system is similar to the old TESScript, but requires a slightly different way of thinking. You can no longer directly manipulate objects in the world; it's now threaded so your script might be interrupted mid-run; it's more of a stickler for things like parentheses. In short, it's much more similar to "real" programming languages like Lua or Python. If you're familiar with TESScript, you'll want to look at our transition guide.
The first thing we're going to do is add a script to the thief so that when it's killed, the quest updates appropriately.
Adding Scripts[edit | edit source]
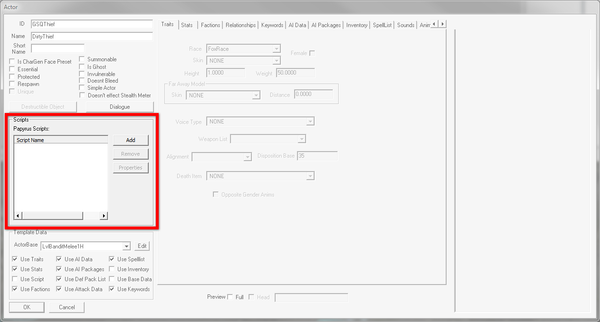
Open up the GSQThief actor that we've been creating so far. We'll be looking at the "Papyrus Scripts" section of the window.
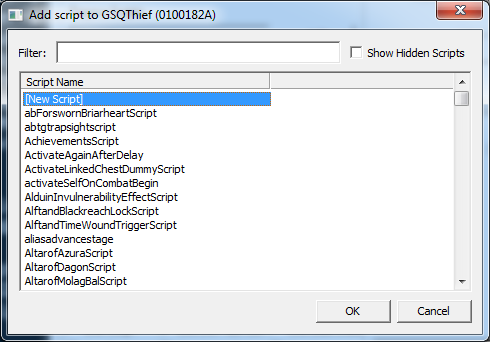
Click the "Add" button. This brings up a list of scripts we could potentially add to this actor. We're making a new one, though, so double-click on "[New Script]" at the top of the list.
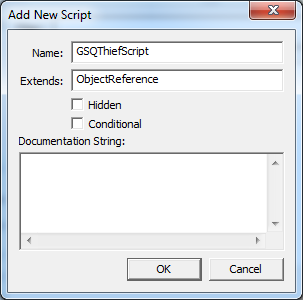
This will pop up yet another window, where you can name your script. Set its name to be "GSQThiefScript" and hit OK.
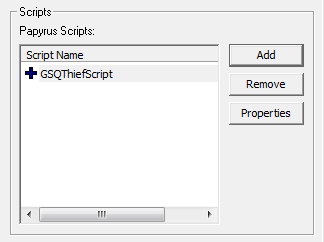
Now your script is added to the actor. But, as you might expect, it's not actually doing anything just yet.
Properties[edit | edit source]
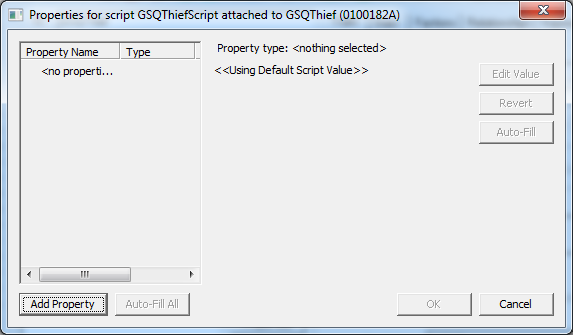
Double-click on the script name to bring up the Properties Window for this script. On their own, scripts don't know about any objects in the game other than the one to which they're attached. We use properties to hook objects together so they can affect each other. In our example, we want to set GSQ01 to stage 20 when the thief is killed, so we need to tell the script which quest we care about.
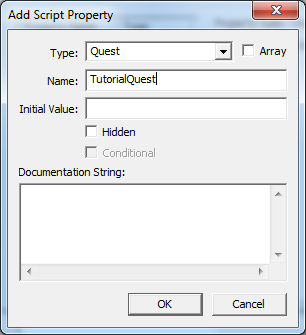
Press the "Add Property" button at the bottom left of this window. This is where we create the property. In the Type field, either choose "Quest" from the pulldown, or type in the word "Quest". Put "TutorialQuest" in the Name field, and leave everything else blank.
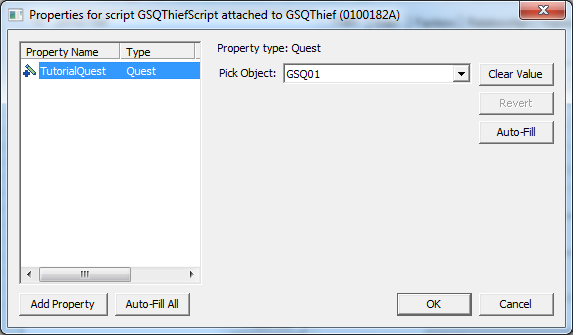
We've now told the script that it should care about something called "TutorialQuest," but it doesn't know which quest that is. Click on the property we just made in the list, and click "Edit Value" on the right side of the window. A new pulldown menu will appear, listing all the quests in the game. Choose "GSQ01" from this menu, and hit OK.
Writing the Script[edit | edit source]
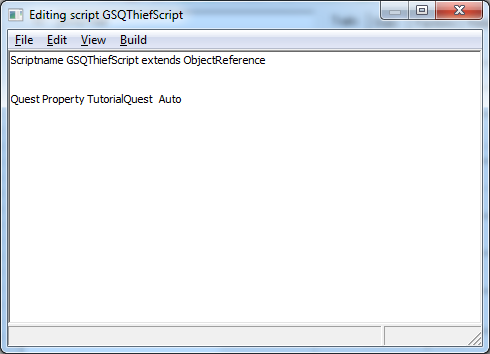
Now that we've added this property, we should add some actual script to do something with it! Right-click on the script name and select "Edit Source" to bring up the script editor.
The top line (Scriptname GSQThiefScript extends ObjectReference) is boilerplate that the editor made for us when we created the script. A few lines below that is the textual version of the property we made.
At the bottom of the text, copy and paste the following snippet of code.
Event OnDeath(Actor killer)
        TutorialQuest.SetObjectiveDisplayed(20)
	TutorialQuest.SetStage(20)
EndEvent
Once again, ignore the SetObjectiveDisplayed(20)
If you're familiar enough with programming or scripting that what you just pasted made sense to you, feel free to skip ahead to the "Scripting the Amulet" section. For everyone else, we'll go through line by line.
Event OnDeath(Actor killer)- This line declares that the script will respond to the actor dying. When the actor dies, the game will start executing the code from this point. The game will put whoever killed the actor into the "killer" variable, but that part doesn't matter to us.
TutorialQuest.SetStage(20)- Just like when we called
SetStageon the owning quest in the dialogue tutorial, this will set stage 20 on the quest that we set with the TutorialQuest property. - We indent it for readability.
- Just like when we called
EndEvent- This signifies the end of our handling of the death event.
Select "Save" from the file menu (or press Ctrl-S) and the editor will attempt to compile your script. An output window will pop up -- if your script is syntactically correct, it will look like this:
If you see anything else in there, you typed something wrong. Try again!
Once you're done, close the script windows and the actor window, and save your plugin. Now it's time to script the amulet itself.
Scripting the Amulet[edit | edit source]
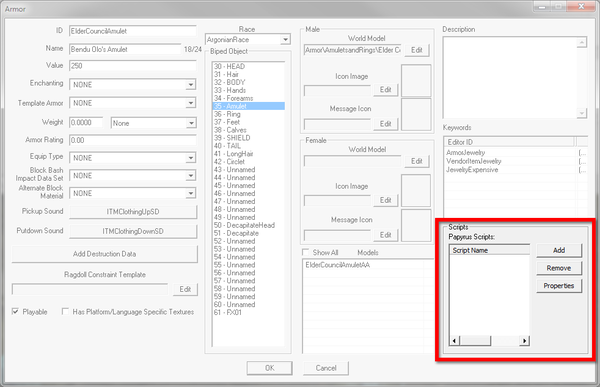
Open up the GSQAmulet item we created in the last tutorial. In the armor window, the scripts area is on the far right.
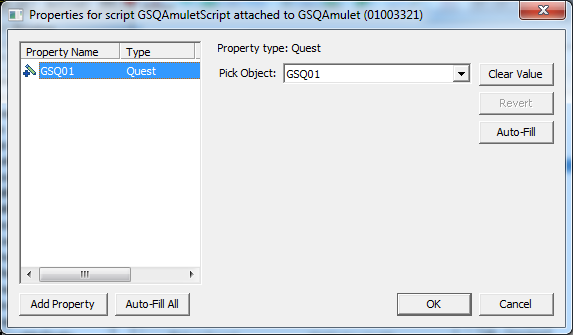
Create a new script just like we did before, and call it GSQAmuletScript. Add a Quest property to it, but to see a nifty trick, call it "GSQ01" instead of "TutorialQuest" this time.
It automatically set the value of the property for you, since you gave the property a name that matches an existing ID. If you're declaring a lot of properties, this can save you a bunch of time.
Open up the script, and we're going to add an event to it. The amulet can't die (obviously), but we do want to know when the player picks it up. Our event script will look like this:
Event OnContainerChanged(ObjectReference newContainer, ObjectReference oldContainer)
	if (newContainer == Game.GetPlayer())
                GSQ01.SetObjectivedisplayed(30)
		GSQ01.SetStage(30)
	endif
EndEvent
Ignore it once again. It will be explained in the section about objectives.
There a few things to note in this script:
- The parameters in the declaration (
newContainerandoldContainer) will get filled in by the game when it tells this script to handle the event. - Because the OnContainerChanged event will fire whenever this object changes hands, we need to make sure we only set the stage when it's the player taking it, hence the
if/endifblock. Game.GetPlayer()is a convenient way to get a reference to the player without needing to set a property, andnewContainerwas filled by the engine when this event fired, so we can do a comparison in the second line to make sure the item is moving into the player.- The way this script is written, SetStage will be called every time the player picks up the amulet. This doesn't matter because each quest stage can only happen once - calling SetStage(30) has no effect after the first time.
This script is also good to go, then. Close the script and armor windows, and save your plugin.
You can now play through the quest from start to finish, checking the console with SQV to see its stage changing.
Players can't be expected to use the console, though, so we'll learn how to give them better feedback about the quest in the next chapter.

The scripts for Skyrim are just text files that live in your data directory before they get compiled into bytecode. This means that if you've got a favorite text editor, you can use it to work on scripts. We've included setups for both Sublime Text and Notepad++ that provide syntax highlighting, some basic autocompletion, and compilation shortcuts. If you're going to get heavily into scripting, these tools can make your life a lot easier.
Notes[edit | edit source]
- Papyrus boxes can be temperamental after the wrong code is inserted. Okaying the form and returning to it and possibly restarting the CK can resolve.
- Removing a saved script from a papyrus box may not automatically remove the associated compiled pex in the script folder, which has an impact on testing in-game.
| Return to Tutorial Hub | Next Tutorial | ||
| Language: | English • français • русский |
|---|
