Bethesda Tutorial Creating an Item
| Bethesda Tutorial Creating an Item | |
|---|---|
| Quest Design Fundamentals Series, Chapter 4 | |
| Return to Tutorial Hub | |
| Next Tutorial | |
Overview[edit | edit source]
This tutorial will walk you through creating the amulet that was stolen from Bendu Olo in our sample quest.
The reader will learn:
- How to create a new item
- How to add that item to an actor's inventory
Creating/Copying an Item[edit | edit source]
For the purposes of modding, you'll most likely be copying an existing item and changing its values. This way you already have a 3D model set up for it, and you're starting from something that you know works, so you don't have to futz with each particular setting.
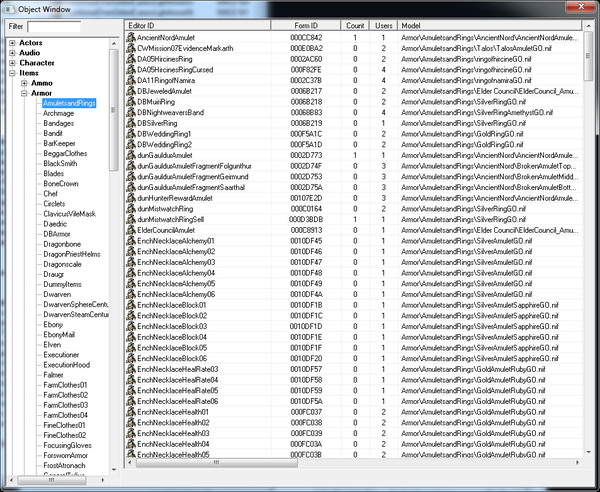
For this amulet, we're going to make a copy of the Elder Council Amulet that is used in the Dark Brotherhood questline. In your object window, navigate to Items -> Armor -> AmuletsandRings.
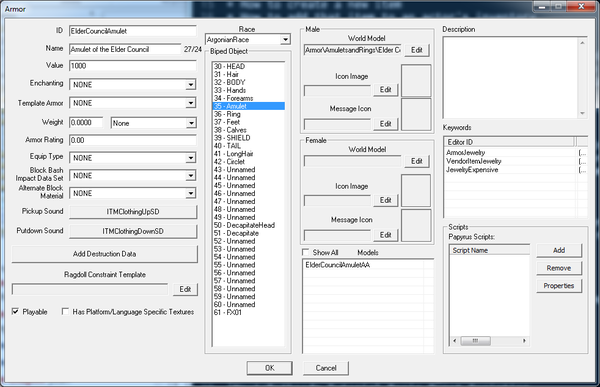
Double-click on "ElderCouncilAmulet" to open up the Armor window.
We're going to make some changes in here to make it into something appropriate for our quest.
- ID: Change to "GSQAmulet"
- Name: Change to "Bendu Olo's Amulet"
- Value: Change to 250 (Bendu is not a man of means)
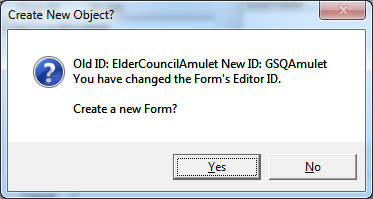
Leave everything else exactly as it is, and hit the OK button. Because we changed the ID, we'll be asked whether we want to create a new object with these attributes, or change the existing one. We want to make a new object, so hit the Yes button.
That's all there is to it! Now in this case we were making a piece of armor, but that same technique can be used on any object in the game that has an ID. You can make new weapons, races, creatures, spells, ingredients, etc. by changing the ID.
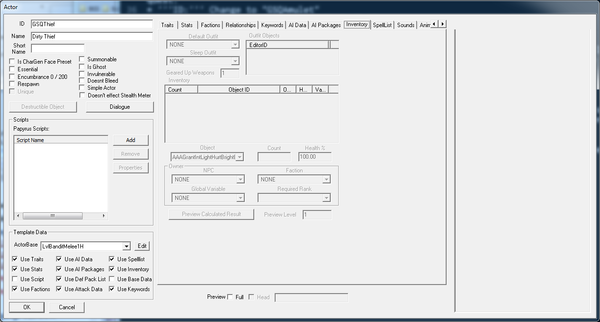
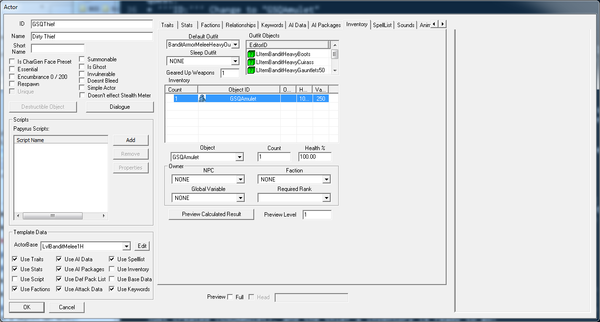
The last thing we should do here is put it into the inventory of our thief. Open up the GSQThief actor again, and navigate to the inventory tab of the Actor window.
The first thing you'll notice is that it's all grayed out. That's because we're basing this actor off of a template, and so the inventory is already set by that template. But we can override individual parts of a template easily. Uncheck the "Use Inventory" box in the bottom left corner of the window, and the inventory area should light up.
We'll have to fill in an outfit for our bandit, since the default template one is now gone. Select "BanditArmorMeleeHeavyOutfit" from the Default Outfit pulldown menu.
To put additional items into the actor's inventory, right-click in the Inventory table and select "New." This adds an entry to the table that defaults to 1 instance of the first object (alphabetically) in the game. From the Object pulldown menu, choose the item we just created (GSQAmulet), and the thief's inventory is ready to go!
See also[edit | edit source]
| Return to Tutorial Hub | Next Tutorial | ||
| Language: | English • français • polski • русский |
|---|
