Bethesda Tutorial Clutter
| Bethesda Tutorial Clutter | |
|---|---|
| Level Design Series, Chapter 3 | |
| Return to Tutorial Hub | |
| Next Tutorial | |
| Example Plugins: | |
| Initial | Completed |
| Companion Video Tutorial | |
Overview[edit | edit source]
In this chapter we will go over cluttering the dungeon with static and moveable objects, adding furniture and adding loot.
The reader will learn:
- The different types of clutter
- How to place regular and leveled loot
- Adding furniture
- Placing doors
Basic Clutter[edit | edit source]
Right now you have a very basic layout for the dungeon with empty rooms and repeating wall pieces. This section will give you some tips on how to nicely break up the space as well as personalizing the rooms to give the dungeon a cohesive feeling.
We'll begin by covering the many types of objects available and exploring several small examples. Once you're done, you should be well equipped to clutter Lokir's Tomb however you want.

It's helpful to give every room a purpose or story when creating it. This will make it easier to clutter since you're just filling in what the room should have as opposed to just adding things to make the room look full. It is also obvious to the player when the room has a reason for existing.
Find & Replace: Swapping Repetitive Pieces[edit | edit source]
The first and simplest way to add some variety to your rooms is by swapping out any repeating kit pieces. To do this you'll need to select the piece you want to replace and use the Ctrl+F hotkey which will bring up the Search & Replace prompt.

Let's try it out now by swapping one of our repetitive wall pieces for a variant.
- Select a NorRmSmWallSide01 piece anywhere in your dungeon.
- Press Ctrl+F to summon the Search & Replace dialog. The editor may hitch.
- The next alphabetical piece - NorRmSmWallSide02, in this case - is automatically selected
- Press OK to change the piece.
As long as you have one or more of the same piece selected, you can now change the selection in the Replace With field to replace the selected pieces.
If you explore the list of available pieces, you'll notice the nordic wall has about eight variations to choose from, including damaged versions. Use the Search & Replace tool and swap out some of your walls so they do not repeat. Swapping in some damaged walls will help add a ruined feeling to the dungeon.
You can use Search & Replace on any object in the game to quickly check if it has variations. If you try it on the nordic floors, for example, you may see that you can replace the flat ground with a pillar. When kit pieces are named, the alphabetical sorting in search & replace is taken into consideration to make these changes quick and easy.

You may have noticed that there are three checkboxes at the bottom of the Search & Replace dialog, with "Selection Only" being chosen by default. This is what you'll want most of the time, but you can also swap all instances of a piece by cell and worldspace. Less obviously, you can perform a swap on every object in the game by unchecking all three boxes. Be careful to only do this if you're absolutely sure! Ctrl+F operations cannot be undone.
Static Clutter[edit | edit source]
Static pieces of clutter make up the majority of large objects in the game. They are placed in the editor and cannot be moved, interacted with, or otherwise influenced by the player. Statics may be items such as tables, platforms, book cases, rubble piles and the kit pieces we've been working with so far.
Placing Objects[edit | edit source]
If you know what pieces you're looking for, you can use ctrl+D to duplicate a piece you already have in the scene and replace it with something else. This is a common workflow technique for advanced level designers, as it can be much faster than manually searching for each piece in the Object Window window.
Let's go through the motions by quickly placing an altar into one of our rooms.
- Select any floor piece from the first room in your dungeon
- Duplicate it with ctrl+D - Note that upon duplication, the new reference is automatically selected.
- Use Ctrl+F to begin Search & Replace
- Replace it with the RuinsAltar piece. - You can do this by manually scrolling through the drop-down list, but it's must faster to click into that list and type the first several letters of the desired piece.
- Position your new altar in the center of the first room

Because duplicated items inherit the exact position, rotation and dimensions of the object they are duplicated from, it's a common mistake to accidentally leave the duplicate item in place. This is a common cause of z-fighting, a common error in games when two overlapping surfaces cause a flickering effect. Be sure to keep an eye out for this as you work.
Clutter will usually follow a naming convention, although it is less stringent than kit naming. If you're looking for all of the nordic clutter you can search for static objects beginning with the prefix Ruins. Here you'll find the benches, altars, tables and other large pieces of clutter appropriate to the setting.
Not all clutter has to add new items and obstacles to a space, however. Perfectly flat, tiling floors create a very sterile and artificial feeling in our spaces. Floor pieces and rubble piles are excellent ways to break up rooms and floors.
- Place some NorRmSmFloorRaised01 objects and 02s around to break up the floor
- Don't worry lining up with the floor pattern - rotate these pieces freely for the best visual effect
- Also place some NorRubblePile01-08 pieces
- Rubble piles are effective in corners and where the wall meets the floor, creating a more natural flow of space
-
For added effect, use the raised floor under your rubble piles to make it look like chunks of the floor have damage. You can also line up the edges to create small canals in the floor to lead the player to areas.
Feel free to add some other static clutter around the room to fill it out as you see fit. This room is to be the entrance to the tomb where people came to pay their respects. Try to find ways to support that through your clutter.
Scaling Objects[edit | edit source]

Scale and rotation are useful tools while cluttering with static objects. Through clever scale and rotation, you can reuse a small amount of pieces multiple times in an area before they become too repetitive.
-
To maintain the proper look of a piece, you should only scale between 0.5 and 1.5. This rule of thumb preserves not only logical and visual consistency, but prevents the texel density of surfaces in an environment from becoming too disproportionate.
Scale An Object[edit | edit source]
Next, we'll place some ruinsFloorCandle... objects around the entrance and use scaling and rotating to prevent them from looking the same. There are a few different ways to scale an object. Try each of these to find what you prefer.
Manual Scaling This technique is useful for precise scaling.
- Double click on the object to bring up its Reference Properties Window
- You'll find Scale at the bottom of the 3D Data tab
- Use the arrows or type the number in manually
Free Scaling This technique is most useful when you want to quickly scale one or more objects arbitrarily.
- Select the object(s) you'd like to scale.
- Press and hold the S key
- Drag the mouse to affect scale.
Gizmo Scaling This technique provides a visual tool for arbitrarily scaling one or more objects. Gizmos are discussed in detail here. NOTE: Although the scaling gizmo has axis handles, non-uniform scaling is not supported except when dealing with editor-created primitives such as triggers and roombounds.
- Select the object(s) you'd like to scale.
- Press the 2 key to summon the scaling gizmo
- Drag the mouse to affect scale.
- Press the 2 key to dismiss the scaling gizmo and resume normal selection.
Moveable Clutter[edit | edit source]
Moveable, or "dynamic" clutter are physics-enabled objects that the player can move around or interact with in some way. This kind of clutter gives the space life and allows the player to interact with the world making it feel more real. The different types are listed below. Note that objects with no physics data will never be movable, regardless of object type. (ToDo: explain what physics data is, and how you can detect whether an object has some).
Misc Item[edit | edit source]
Misc items are the most prominent type of moveable clutter in the game and includes things like plates, utensils, goblets and buckets.
- The defining properties of a Misc Object
- Objects the player can manipulate in game
- Player can pick these up and add them to their inventory
- Some Misc Items are valuable/useful, and this should be considered for pacing/balance reasons.
Place some misc items around the room, like the examples below:
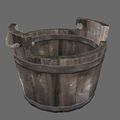
Fig. 3.3:
Bucket01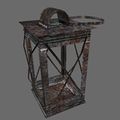
Fig. 3.4:
Lantern01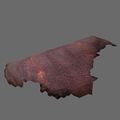
Fig. 3.5:
Leather01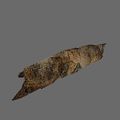
Fig. 3.6:
RuinsLinenPile01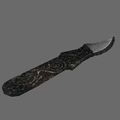
Fig. 3.7:
RuinsScalpel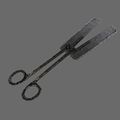
Fig. 3.8:
RuinsScissor


Moveable Statics[edit | edit source]
Moveable statics are pieces of clutter that the player can move, but cannot take. This includes things like bones, urn chunks and some rubble blocks.
- The defining properties of a Moveable Static
- Player can manipulate/grab in game
- Player cannot add these to their inventory
Try placing some of the example items below around your level:
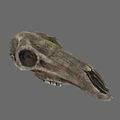
Fig. 3.9:
BoneDeerSkull01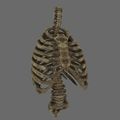
Fig. 3.10:
BoneHumanRibcage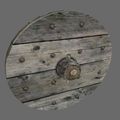
Fig. 3.11:
HandCartWheel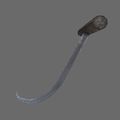
Fig. 3.12:
Hook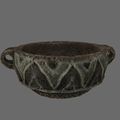
Fig. 3.13:
RuinsPot01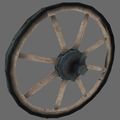
Fig. 3.14:
WagonWheel


-
Interactivity can be both a blessing and a curse for player immersion. Where two visually-similar but differently-typed objects are adjacent, it damages immersion, as the player can take or use one, but not the other. If one skeleton in an area can be searched, all should be searchable. If you used a RuinsFloorCandleLamp... static, it should not be adjacent to -- or even in the same room as -- a RuinsFloorCandleStand... movable static, or the player will be asking "why can I only knock stands over when they have no candles on?"
Physics Settling[edit | edit source]

Physics settling is an important tool in the editor. This feature allows you to switch physics on in the editor, causing any selected, physics-enabled objects to interact with the environment. This is much faster and often more accurate than manually placing all objects.
Havok Preview Button
Pressing the Run Havok Sim button, pictured in Fig. 3.15, with a moveable static selected will cause the object to behave as it would in-game. This is a great way to make clutter placement look more random, or to see how an object will act if the game were running.

- Select one of placed ruinsPot*s you've placed
- Raise and rotate it in mid-air above the floor
- Keeping the object selected, press the Havok button

- Allow the pot will fall to the ground and roll around until it settles
- When satisfied with the positioning of the pot, turn settling back off.
-
In order for Havok Sim to work, the selected object must be from the moveable static item list. Static items will not react the "Run Havok Sim" button is pressed.

Unlike previous Bethesda toolsets, physics-enabled objects in the Creation Engine will automatically settle when they are loaded in-game. Objects marked with "Don't Havok Settle", shown in Fig 3.16, will skip their initial settle, but still simulate when affected by some impulse in-game. For example, a bucket in mid-air with this box checked will still be floating in that position when you load the game. Once hit by some other physics entity, however - such as an arrow, spell or the player - it will behave just like any other object.
-
Because all objects settle once the player gets close enough, it is important to run Havok settling on the whole area before releasing it, by zooming out, drag-selecting the whole map, and clicking the Havok button, then going back and checking that none of the objects "settled" down through shelves or tables! While it can be painful to find and fix all these settling bugs, and you may not even find all items that disappeared, it is still far better than having the player walk up to an item on a table, only to see it sink away out of sight!
-
For advanced users who wish to disable the physics simulation of an object entirely, there is an included Papyrus script called defaultDisableHavokOnLoad which can be attached specifically for this purpose, although its use is not necessary for this tutorial.
-
It is much easier to use Havok settling to place an item at a realistic angle, than to rotate a static item and make sure it is resting correctly. So where there are movable and static versions of the same object, and you wish to place the static one to rest on an angled surface, it is often faster to place the movable version, settle it, then use Ctrl-F to convert it to the static version. RuinsPot and RuinsPotStatic are good examples of this.
Animating Objects[edit | edit source]
Animating objects are a type of moveable static that the player cannot interact with, but provides particles or an animation. Some examples would be banners, fires or water drips. Placing fire effects in sconces is a great way to create light sources - although you will have to add the actual light-casting actor separately. This is covered in a later tutorial.
-
Animating objects and FX can generally be previewed with the Animate Lights and Effects  button in the Main Toolbar. Unlike previous Bethesda toolsets, it is not neccessary to enable physics simulation just to preview these effects.
- The defining properties of an Animating Object
- These objects remain in place but have built in particles or animations
- Player cannot manipulate these in game
- Player cannot add these to their inventory
Place some animating objects around the rooms, such as the examples below.
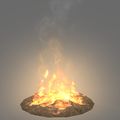
Fig. 3.17:
FXFireWithEmbersHeavy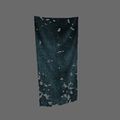
Fig. 3.18:
GenericBannerBlue01


-
It's important never to rest non-movable statics ontop of movable objects. FXFireWithEmbersHeavy looks quite nice in a RuinsPot - but this would be a mistake. The player can move the RuinsPot, and the fire would look very wrong. This is the type of situation where a static version of a movable object comes in handy - RuinsPotStatic in this case.
-
Corpses can also be placed using physics settling. Unlike previous Bethesda toolsets, however, simply setting the health of an actor doesn't actually cause it to be dead at game time. In order to mark an actor dead (and, in turn, allow it to be settled in-editor), check the "Starts Dead" checkbox on the reference properties. This is visible in the grayed-out area of Fig 3.16, just above "OK" and "Respawns".
-
It's possible to adjust the position of a physics-enabled object while simulation is toggled on. For small, precise changes, try holding alt and dragging on the object. This is especially useful for objects with multiple joints, such as corpses, as you can grab the individual "bones" in the rig.
Loot[edit | edit source]
Ah, loot. Searching for and acquiring new items is a core element of the Skyrim experience, and should be considered an integral part of your dungeon. Luckily, the Creation Kit includes several ways to populate your dungeon with loot, including loosely placed items, containers and leveled items. Let's consider some of the options we can work with.
Loose Loot[edit | edit source]
Just about any object in the editor can be placed loosely in your space. This can serve the dual purpose of providing loot and visual interest to a space. Here are a few of the major object types at your disposal:
- Armor: Any objects that the player can wear, including non-armored clothing. Single pieces like gloves, boots and helmets will show up in the editor/game as their normal pieces, but chest pieces will appear folded up.
- Books: Regular books are a great object to throw around rooms. Pepper in an occasional spell tome or skill book to keep the player reading them. Keep in mind that vanilla Skyrim dungeons typically only include one skill book, if any. When a player activates a book in the world it will open the book but not automatically give it to the player.
- Ingredients These are objects like food and alchemy ingredients that the player can pick up and consume for an effect. Used in alchemy and potion creation.
- Potions Similar to ingredients
- Weapons The weapons usable by the player. When placed in the world these will appear the same as when the player would have them equipped.
-
Don't Havok Settle is a great way to have objects appear to be mounted on walls. There are some examples at the final room in the south hall with some weapons "mounted" to the head sculptures.
Containers[edit | edit source]
Containers are objects like chests and urns that have an internal list of what the player can receive when looted. The chest fills itself when the cell is loaded. One of the major benefits of placing a chest is that most pre-made chests are designed to scale the loot to the player's level. That way you don't have to place separate objects to take the player's level in to account.
Place some containers around the room, such as the examples below. Note the "Treas" prefix. This is short for "treasure", meaning that these containers are more likely to have items of value.
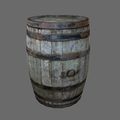
Fig. 3.22:
BarrelFood01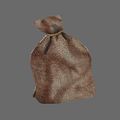
Fig. 3.23:
MiscSackLarge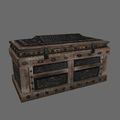
Fig. 3.24:
TreasDraugrChest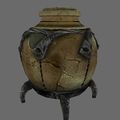
Fig. 3.25:
TreasRuinsUrnLarge02


Previewing Contents[edit | edit source]
The Creation Kit offers the ability to preview the contents of any given container at various encounter zone levels. This can be a useful way to get an idea of what sort of loot the player may see, which can be difficult to approximate in-game due to the randomized nature of most loot containers.
- Double click on the object you want to preview
- Click Edit Base to view the container Base Object (Fig 3.19)
- Click on Preview Calculated Result (Fig 3.19a)
- This displays a randomly-generated list of loot the container may produce (Fig 3.20)
- Repeat this as many times as you'd like to see additional possible loot results
- You can also change the preview level to see what the loot would be like at different levels. Note that the level of a container is based on the encounter zone of the area a container is within, which may not always be the same as the current player level.
- Fig 3.21 shows an example of the same chest at player level 30
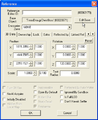
Fig. 3.19: Edit Base Button
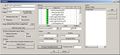
Fig. 3.19a: Preview Calculated Result Button
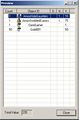
Fig. 3.20: Loot Preview Window
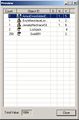
Fig. 3.21: Loot Preview Window at Level 30


Leveled Items[edit | edit source]
-
Leveled items, or "dummy" objects, are a new feature in the Creation Kit. These allow you to place loose items that will be leveled appropriately in a space. Read on for more information!
The Creation Kit features a number of Dummy objects. These are simple markers that approximate the size and shape of various loot objects that can be loosely placed around the environment. Dummy objects do nothing on their own, and must have a Leveled Item list associated to generate loot in-game. Let's place a leveled potion using a dummy now:

- Place a dummyPotion object (under Magic in the object tree window) in the level. Be sure markers are displayed ("M" hotkey)
- Double click on the object and go to the Leveled Item tab (Fig. 3.30)
- You can use the filter to search for the type of potion you want
- (optional) Type restore in the filter.
- Set the Leveled Item Base Object to LItemPotionRestoreHMS
- "LItem" is shorthand for Leveled Item. "HMS" is an abbreviation of Health/Magicka/Stamina, which means this potion will restore one of those three resources.
- You can also choose items with the "Best" suffix, indicating that the list will attempt to produce the best item appropriate to the current level.
-
Dummy items are counted as markers - so be sure you have the "M" key toggled so that you can see them!
Some Dummy Objects[edit | edit source]
The following are some of the dummy objects you can use. Try placing some around your dungeon and experiment with the different Litem lists available. Remember - if you do not set a Leveled Item, nothing will appear.
Likewise, remember that the Dummy objects are only helpers, and know nothing about their Leveled Item lists. This means that if you accidentally set up a dummyPotion object with a LItemArmorShieldHeavy list, for example, the item will generate a shield at run-time. The resulting shield is likely to intersect the world, depending on how the dummy object had been placed.
- DummyBook
- DummyBoots
- DummyBow
- DummyCuirass
- DummyDagger
- DummyGauntlets
- DummyHelmet
- DummyMace
- DummyPotion
- DummyShield
- DummySoulGem
- DummyWeapon1H - Can be any one-handed weapon
- DummyWeapon2H - Can be any two-handed weapon
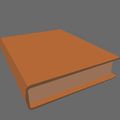
Fig. 3.26:
Dummy Book
Fig. 3.27:
Dummy Helmet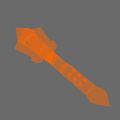
Fig. 3.28:
Dummy Mace
Fig. 3.29:
Dummy Potion


-
To prevent Dummy items from being generated and then promptly settling through the furniture, place the dummies a little above the surface on which you intend for them to rest. Better for the player to hear the item drop a little, than to see it plunge through a solid tabletop to become inaccessible!
Furniture[edit | edit source]
Placing Markers[edit | edit source]
When placing a furniture marker, it is important to make sure that it is facing the proper direction. This isn't always obvious, as with a chair. It's easy to accidentally place a bench that will seat NPCs facing into a wall, for example. The easiest way to check for this is with the 'M' hotkey which will toggle markers. Let's place a bench now.
- Place a ruinsBench01, as shown in Fig. 3.31.
- Fig. 3.32 shows the same bench with markers toggled on ('M' Hotkey)
- The blue humanoid models are where the actor will be while in the marker. Make sure they face out.
- The light blue diamonds indicate entry/exit nodes, and should not be blocked by any walls/objects.
- Place more furniture around the level, including the examples in Fig. 3.33 and 3.34 below.
-
It is important to make sure the exit nodes go in to areas that actors can move around in. Otherwise the actor can get stuck.
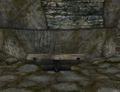
Fig. 3.31: Ruins Bench with Markers toggled off
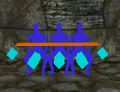
Fig. 3.32: Ruins Bench with Markers toggled on
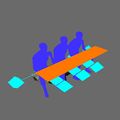
Fig. 3.33:
RuinsBench01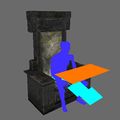
Fig. 3.34:
NorThroneShadow


Interactive Furniture[edit | edit source]
Some furniture markers are interactive, such as crafting stations. These are placed in the world just like regular furniture markers. Place some interactive furniture around the level, such as the examples in Fig. 3.35-3.37. This kind of furniture is especially useful for creating a sense of life in NPC-populated dungeons, although we won't be using them as such in this example.
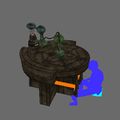
Fig. 3.35:
Crafting AlchemyWorkbench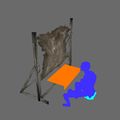
Fig. 3.36:
Crafting TanningRackMarker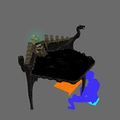
Fig. 3.37:
Crafting EnchantingWorkbench


-
Some of the crafting objects have tabletop versions as well. This is simply a version of the marker that can be placed on other objects but shares the same basic art. Be careful to line these items up with the floor properly, as to avoid NPCs (or the player) appearing sunken or floating while using them.
Doors[edit | edit source]
Doors simply open and close when activated by the player. They can optionally be locked at various difficulties, including requiring a Key to open.
Doors can also be set to start open; to accomplish this, check the Open By Default box on the reference properties. This is also a useful trick to see which way the door opens. Generally speaking, it's best to have doors swing away from the player when possible.
-
Open By Default also works on containers, and can be useful if you want to check the opening animation of a container (where applicable) or manually set up a chest that looks like it's already been looted.
The doors that work with this kit begin "Nor" - such as NorDoorMedium01 and NorDoorSm01.
The various parts of the name are once again meaningful:
- MinUse - The base object has the "Minimal Use" checkbox checked, which means NPCs will avoid this door if possible. This is useful to prevent NPCs from wandering into the wrong areas, and possibly to prevent companions from rampaging through inside areas that the player has not yet explored, just to get to an outer balcony.
- Load - These doors are for teleporting to new areas. They typically do not open properly, and have only one side, and a slight "starting to open" animation.
Locking Doors & Containers[edit | edit source]

Let's try locking an object in your dungeon. You can lock a door or a container; it's your choice.
- Double click on the door to open the reference
- Navigate to the Lock tab (Fig. 3.38)
- Check the Locked check box
- Level is the difficulty of the lock. Requires Key means it cannot be picked.
- (optional) The Key field is for any key that can unlock the door.
-
Locking critical-path doors (those that prevent forward progress through a space/quest) is usually a bad idea unless you're providing a key somewhere. Likewise, it's generally best to avoid locking objects that wouldn't conceivably feature a keyhole, such as bags or barrels.
Cluttering Lokir's Tomb[edit | edit source]
As you can see, there are many tools at your disposal for cluttering a space. Try employing everything you've learned here to flesh out the clutter in this, keeping in mind the purpose of each room and any story goals you may have. If you're stuck for ideas, try checking out other cells in the editor or load up the example plugin, which shows a fully cluttered version of Lokir's Tomb.
Once you're satisfied with the layout and clutter of the Tomb, you're ready to move onto making the space navigable for enemies and followers - covered in the next tutorial: Navmesh!
Object Palettes (OPALs)[edit | edit source]
OPTIONAL
While the Duplicate-and-Replace method described above is a fast way to place clutter (especially once you become familiar with the Creation Kit's naming conventions), you may also want to experiment with the Object Palettes (OPAL), which allows you to create and manage collections of objects, and place them in the world directly. For more information, please refer to the tutorial on the OPAL page.
| Return to Tutorial Hub | Next Tutorial | ||
| Language: | English • français • 日本語 • polski |
|---|