Bethesda Tutorial Clutter/ja
 | このページは日本語です。 テキストのすべてまたは選択された部分の翻訳が必要です。 |
 | このページは日本語です。 リンク先ページの編集上の訂正または翻訳が必要です。 |
| Bethesda Tutorial Clutter/ja | |
|---|---|
| レベルデザイン シリーズ、3章 | |
| チュートリアルハブに戻る | |
| 次のチュートリアル | |
| プラグインの実例: | |
| 初期 | 完成 |
| コンパニオン・ビデオ・チュートリアル | |
Overview[edit | edit source]
Overview(概要)
このチャプターは「Static(静的オブジェクト)」や動的オブジェクトでダンジョンを散乱させ、家具や戦利品を加えていきます。
このチャプターで読者が学べること:
☆異なるClutterのタイプ
☆通常の設置方法とレベルド戦利品
☆家具を加える
☆ドアを置く
In this chapter we will go over cluttering the dungeon with static and moveable objects, adding furniture and adding loot.
The reader will learn:
- The different types of clutter
- How to place regular and leveled loot
- Adding furniture
- Placing doors
Basic Clutter[edit | edit source]
Basic Clutter(散乱の基本)
空っぽの部屋と同じ壁が続いているピースを持ったダンジョンのとても基本的なレイアウトをしていきましょう。このセクションはどうやってうまく密集性を持ったダンジョンを作るため、固有の部屋を作成するかについて、いくつかの情報をあなたに与えるでしょう。
私たちは多くの利用可能なオブジェクトのタイプと幾つかの事例について言及するつもりです。Lokir's Tombを散乱させるので準備してください。
散乱は目的やストーリーを部屋に与えるのに役立ちます。これは部屋を満杯に見せるために、ただ物を加えるのとは対照的です。その部屋に存在理由があるならば、プレイヤーにとってもそれは一目瞭然となります。
Right now you have a very basic layout for the dungeon with empty rooms and repeating wall pieces. This section will give you some tips on how to nicely break up the space as well as personalizing the rooms to give the dungeon a cohesive feeling.
We'll begin by covering the many types of objects available and exploring several small examples. Once you're done, you should be well equipped to clutter Lokir's Tomb however you want.
Find & Replace: Swapping Repetitive Pieces[edit | edit source]
Find & Replace: Swapping Repetitive Pieces
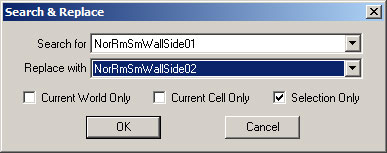
あなたの部屋に何らかのバラエティーを加える簡単な方法は、反復性があるキットピースを交換することです。それをするにはあなたが差し替えたいそのピースを選択し、「Ctrl+F」キーで「Search & Replace」プロンプトを出現させてください(図Fig. 3.1参照)。
(図Fig. 3.1参照)
反復性のある壁の1つを別のものと交換してみましょう:
[1] あなたのダンジョンの「NorRmSmWallSide01」を選択します
[2] 「Ctrl+F」で「Search & Replace」ウィンドウを出現させます
[3] 次のアルファベット順のキットが自動的にプルダウンメニューにセットされます(このケースなら「NorRmSmWallSide02」が自動的に選択されます)
[4] OKボタンを押してそのピースを交換します
ピースの1つ又は複数を選択している間は、その選択されたピースと置き換えるキットを「Replace With」プルダウンメニューから選択できます。
もしあなたが利用可能なピースのリストを調べるなら、Nordic Wallは8つのバリエーション(破損している壁も含め)があることに気づくでしょう。「Search & Replace」ツールを使用して、いくつかそれらの壁が繰り返さないように壁を置き換えてみてください。いくつかダメージがある壁に置き換えれば、荒廃した雰囲気をダンジョンにだすことができるかもしれません。
「Search & Replace」を使えばそのオブジェクトがバリエーションを持っているかすぐにチェックすることができます。Nordic Floorsでそれを試すなら、平坦な地面をPillar(柱)を持っている地面に変える事ができるのがわかるはずです。キットピースは命名されると、「Search & Replace」でアルファベット順に分類され、これら置換えを素早く簡単にするよう考慮に入れられます(置換え・検索対象になるということ)。
あなたは「Search & Replace」の下の3つのチェックボックスで「Selection Only」がデフォルトで選択されていることに気づいたかもしれません。 これはたいてい皆が望むので、デフォルトでチェックが入っています。しかしあなたがセルとWorldspaceによるピースの全てを置換えたい場合にはそのチェックを外してください。これはその名前の付くキットスペースがすべて選択したピースに置換わるということを意味します。この操作については絶対に確信している時にだけそれをするようにしてください。「Ctrl+F」の操作を元に戻すことはできません。
The first and simplest way to add some variety to your rooms is by swapping out any repeating kit pieces. To do this you'll need to select the piece you want to replace and use the Ctrl+F hotkey which will bring up the Search & Replace prompt.
Let's try it out now by swapping one of our repetitive wall pieces for a variant.
- Select a NorRmSmWallSide01 piece anywhere in your dungeon.
- Press Ctrl+F to summon the Search & Replace dialog. The editor may hitch.
- The next alphabetical piece - NorRmSmWallSide02, in this case - is automatically selected
- Press OK to change the piece.
As long as you have one or more of the same piece selected, you can now change the selection in the Replace With field to replace the selected pieces.
If you explore the list of available pieces, you'll notice the nordic wall has about eight variations to choose from, including damaged versions. Use the Search & Replace tool and swap out some of your walls so they do not repeat. Swapping in some damaged walls will help add a ruined feeling to the dungeon.
You can use Search & Replace on any object in the game to quickly check if it has variations. If you try it on the nordic floors, for example, you may see that you can replace the flat ground with a pillar. When kit pieces are named, the alphabetical sorting in search & replace is taken into consideration to make these changes quick and easy.
Static Clutter[edit | edit source]
Static Clutter
Clutterの静的オブジェクトはゲームの大きいオブジェクトの大部分を補います。それらはエディターに置かれ、動くことはできないし、プレイヤー含め相互作用・影響しません。静的オブジェクトはテーブルや本箱、瓦礫のようなアイテムのことです。
Static pieces of clutter make up the majority of large objects in the game. They are placed in the editor and cannot be moved, interacted with, or otherwise influenced by the player. Statics may be items such as tables, platforms, book cases, rubble piles and the kit pieces we've been working with so far.
Placing Objects[edit | edit source]
Placing Objects(オブジェクトの設置)
もしあなたが探しているピースが何かを知っているならば、すでに設置してある、置換えられるそれらピース(床などが適当)を「ctrl+D」でコピーしてください(すると床とそのアイテムが置き換わり、いちいちアイテムをRender Windowへ放り込んで位置を調整する手間が省けます)。これはレベルの高いデザイナーが用いる一般的な作業フローのテクニックです。
この方法で部屋に祭壇を1つ効率よく置いてみましょう:
[1] ダンジョンの最初の部屋にある床ピースをどれでもいいので(できれば部屋の中心近くの床)選択してください
[2] 「Ctrl+D」でそれをコピーします - 複製の時に新しいリファレンスが自動的に選択されるのに注意してください
[3] 「Ctrl+F」で「Search & Replace」を出してください
[4] そのコピーされた既存の床ピースと「RuinsAltar(祭壇)」とを置き換えて下さい - ドロップダウンメニューを手動でスクロールして目的物を探すこともできますが、希望のピースの頭文字数行をタイピングし、検索物を絞り込むことで早く見つけることができます。
[5] 最初の部屋の中心に新しい祭壇を移動させてください
コピーされたアイテムはコピーされる既存のオブジェクトから正確な位置、回転、寸法を引き継ぐので、定位置にコピーされたアイテムをうっかりそのままにしてしまうのはよくあるミスです(コピーすると全く同じ場所に複製が出現するので、うっかり忘れるということ)。これはZ軸の競合における一般的な共通原因であり、2つのオブジェクトが重なっていることから形状が揺らめく効果を引き起こすことでエラーが生じます。作業中はコピーしてオブジェクトが重なったままでないか注意してください。
Clutterは通常、命名規則の後に続きますが、キットネーミングより厳格さはありません。もしあなたが、ノルド系Clutterを探しているならば、接頭語がRuins~で始まる静的オブジェクトを検索してください。そこではベンチや祭壇、テーブル、その他大きなピースがなどを使用するのが適切だとわかるでしょう。
しかしながら、すべてのClutterをスペースに新しいアイテム・障害物を加えなければならないわけではありません。完全に平らなタイルの床はその空間が無機質で人工的な印象を与えるでしょう(これは散乱とは対極の印象を与えます)。それに対して、床の断片や瓦礫が堆積している床ピースは、アイテムを設置しなくとも、散乱した印象を与えてくれるでしょう。
[1] 「NorRmSmFloorRaised01」ピースと「NorRmSmFloorRaised02」ピースをいくつか置いてみてください
[2] 同じ種類が並んでいても気にしないでください - 見た目の効果を上げるためこれらのピースの方向を回転させてください
[3] また「NorRubblePile01から08」ピースを置いてみてください
[4] 瓦礫の堆積ピースは部屋のコーナーや壁際い置くのが良いでしょう
相乗効果のため、Raised floor(高い床)の下にそれら瓦礫の堆積ピースを敷いて、床がダメージを受けて破損しているように見せてください。またプレイヤーをエリアに導くための床に小さな堀を作成するようその先端を並べることも良いでしょう。
あなたが感じるままにその部屋に他の静的オブジェクトを加えて散乱した雰囲気をだしてください。この部屋は墓の入り口であり、敬意を表しに人々が来る場所です。散乱を通じてそれらを表現する方法を見つけてください。
If you know what pieces you're looking for, you can use ctrl+D to duplicate a piece you already have in the scene and replace it with something else. This is a common workflow technique for advanced level designers, as it can be much faster than manually searching for each piece in the Object Window (en) window.
Let's go through the motions by quickly placing an altar into one of our rooms.
- Select any floor piece from the first room in your dungeon
- Duplicate it with ctrl+D - Note that upon duplication, the new reference is automatically selected.
- Use Ctrl+F to begin Search & Replace
- Replace it with the RuinsAltar piece. - You can do this by manually scrolling through the drop-down list, but it's must faster to click into that list and type the first several letters of the desired piece.
- Position your new altar in the center of the first room
Clutter will usually follow a naming convention, although it is less stringent than kit naming. If you're looking for all of the nordic clutter you can search for static objects beginning with the prefix Ruins. Here you'll find the benches, altars, tables and other large pieces of clutter appropriate to the setting.
Not all clutter has to add new items and obstacles to a space, however. Perfectly flat, tiling floors create a very sterile and artificial feeling in our spaces. Floor pieces and rubble piles are excellent ways to break up rooms and floors.
- Place some NorRmSmFloorRaised01 objects and 02s around to break up the floor
- Don't worry lining up with the floor pattern - rotate these pieces freely for the best visual effect
- Also place some NorRubblePile01-08 pieces
- Rubble piles are effective in corners and where the wall meets the floor, creating a more natural flow of space
Feel free to add some other static clutter around the room to fill it out as you see fit. This room is to be the entrance to the tomb where people came to pay their respects. Try to find ways to support that through your clutter.
Scaling Objects[edit | edit source]
静的オブジェクトを散乱させるにあたり、スケール変更と回転は役に立ちます。賢いスケール変更と回転をすることでバリエーションを与え、同じエリアで少しのオブジェクトをうまく使いまわすことが可能です。
オブジェクトの適切な外観を維持するため、0.5~1.5の範囲でスケール変更をすべきです。この経験則は論理的ではありませんが、ビジュアルの一貫性を保持し、オブジェクト表面のテクセル(テクスチャのピクセル)密度が不均衡になりすぎるのを防ぐことができます。
Scale and rotation are useful tools while cluttering with static objects. Through clever scale and rotation, you can reuse a small amount of pieces multiple times in an area before they become too repetitive.
Scale An Object[edit | edit source]
Scale An Object(オブジェクトのスケール変更)
次に、エントランスの周りにRuinsFloorCandles(キャンドル)をいくつか置いていきますが、同じに見えないようスケール変更と回転を使用するつもりです。 オブジェクトをスケール変更する方法はいくつかあります。それぞれ試してみて、あなたが好むものを見つけてください。
「手動スケール変更」 - これは正確なスケール変更に役にたちます
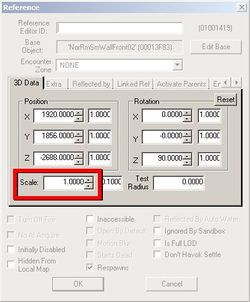
[1] オブジェクトをダブルクリックして「Reference Properties Window」を持ってきてください
[2] その「3D Data」タブの下で「Scale」を見つけてください
[3] 矢印を使用するか、手動で数値をタイプしてください
「フリースケール変更」 - これは一個以上のオブジェクトをまとめてスケール変更したい時に役立ちます
[1] あなたがスケール変更したい、それら複数のオブジェクトを選択します
[2] 「S」キーを押したままにします
[3] マウスをドラッグしてスケールを変更してください
「ギズモスケール変更」 - これは1つまたはそれ以上のオブジェクトをスケール変更するビジュアルツールを提供します。ギズモについての詳細は「ここ」で説明されています。注意:スケーリングギズモは軸ハンドルがありますが、トリガーやルームバウンドのような「editor-created primitives」で対応する時意外に、不均等(XYZ軸で異なるよう)なスケール変更はサポートされていません。
[1] スケール変更したいオブジェクト(たち)を選択してください
[2] 「2」キーを押してスケーリングギズモを呼出してください
[3] マウスドラッグで大きさを決めてください
[4] 変更が終わったら、スケールギズモモードを「2」キーで終了してノーマルモードにもどしてください
Next, we'll place some ruinsFloorCandle... objects around the entrance and use scaling and rotating to prevent them from looking the same. There are a few different ways to scale an object. Try each of these to find what you prefer.
Manual Scaling This technique is useful for precise scaling.
- Double click on the object to bring up its Reference Properties Window
- You'll find Scale at the bottom of the 3D Data tab
- Use the arrows or type the number in manually
Free Scaling This technique is most useful when you want to quickly scale one or more objects arbitrarily.
- Select the object(s) you'd like to scale.
- Press and hold the S key
- Drag the mouse to affect scale.
Gizmo Scaling This technique provides a visual tool for arbitrarily scaling one or more objects. Gizmos are discussed in detail here. NOTE: Although the scaling gizmo has axis handles, non-uniform scaling is not supported except when dealing with editor-created primitives (en) such as triggers and roombounds.
- Select the object(s) you'd like to scale.
- Press the 2 key to summon the scaling gizmo
- Drag the mouse to affect scale.
- Press the 2 key to dismiss the scaling gizmo and resume normal selection.
Moveable Clutter[edit | edit source]
可動または「動的」オブジェクトはプレイヤーが移動することができたり、インタラクティブな物理法則が有効になっているオブジェクトです。この種類の散乱はその空間に命を与え、プレイヤーとインタラクティブであり、よりリアルだと感じさせることができます。そのタイプについては以下を参照してください。
注意:物理法則がないデータを持つオブジェクトはオブジェクトタイプに関わらず、決して可動しません。
Moveable, or "dynamic" clutter are physics-enabled objects that the player can move around or interact with in some way. This kind of clutter gives the space life and allows the player to interact with the world making it feel more real. The different types are listed below. Note that objects with no physics data will never be movable, regardless of object type. (ToDo: explain what physics data is, and how you can detect whether an object has some).
Misc Item[edit | edit source]
Misc Item(雑多、その他のアイテム)
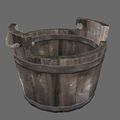
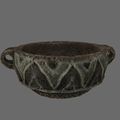
「Misc Item」は可動オブジェクトで最も著名なもので、プレート、ツール、ゴブレット、バケツのようなものを含みます。
「Misc Item」の特性:
☆ゲームでプレイヤーが操作できるオブジェクト
☆プレイヤーがスリ盗ることができ、インベントリーに加えられるもの
☆いくつかの雑多アイテムは効果・役立つもので、これはペース・バランスが重要
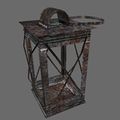
以下のサンプルのような雑多アイテムをいくつか部屋に置いてみてください:
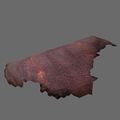
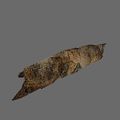
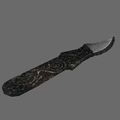
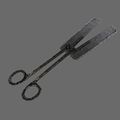
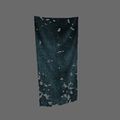
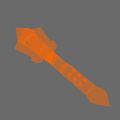
「Bucket01」 「Lantern01」 「Leather01」
「RuinsLinenPile01」 「RuinsScalpel」 「RuinsScissor」
Misc items are the most prominent type of moveable clutter in the game and includes things like plates, utensils, goblets and buckets.
- The defining properties of a Misc Object
- Objects the player can manipulate in game
- Player can pick these up and add them to their inventory
- Some Misc Items are valuable/useful, and this should be considered for pacing/balance reasons.
Place some misc items around the room, like the examples below:
Moveable Statics[edit | edit source]
Moveable Statics(可動静的オブジェクト)
「Moveable Statics」はプレイヤーが動かすことはできるが、取る事ができないものです。
「Moveable Static」の特性:
☆プレイヤーは操作・掴むことができる
☆プレイヤーはそれらをインベントリーに加える事ができない
以下のサンプルのようなオブジェクトをいくつか部屋に置いてみてください:
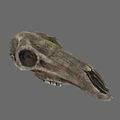
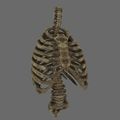
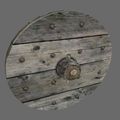
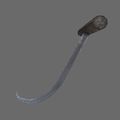
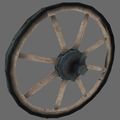
「BoneDeerSkull01」 「BoneHumanRibcage」 「HandCartWheel」
「Hook」 「RuinsPot01」 「WagonWheel」
Moveable statics are pieces of clutter that the player can move, but cannot take. This includes things like bones, urn chunks and some rubble blocks.
- The defining properties of a Moveable Static
- Player can manipulate/grab in game
- Player cannot add these to their inventory
Try placing some of the example items below around your level:
Physics Settling[edit | edit source]
Physics Settling(物理法則設定)
Physics Settlingはエディターで重要なツールです。これはエディターで物理法則の有無を切替えることができ、物理法則が有効な選択されたオブジェクトのみ利用できます。これは手動でオブジェクトを置くよりもはるかに早くて、より正確な場合が多いです。
Physics settling is an important tool in the editor. This feature allows you to switch physics on in the editor, causing any selected, physics-enabled objects to interact with the environment. This is much faster and often more accurate than manually placing all objects.
Havok Preview Button
Havok Preview Button(ハボックプレビューボタン)
(図Fig. 3.15)「Run Havok Sim」ボタンを押すと、選択されたMoveable Staticはゲームと同じ振舞いをオブジェクトに起こすでしょう。それはよりランダムに散乱させる良い方法です。またそのオブジェクトがゲームでどのような振舞いをみせるのか調べるのに良い方法です。
(図Fig. 3.15)
[1] 置かれているPuinsPot*sの1つを選択してください
[2] 床からそれを空中のもっていき回転させてください
[3] オブジェクトを選択したまま、「Run Havok Sim」ボタンを押してください
[4] それが床に落ちて落ち着くまで待ってください
[5] そのポットの位置が決定されたら、「Run Havok Sim」ボタンをもう一度押して、Havock環境をオフにしてください
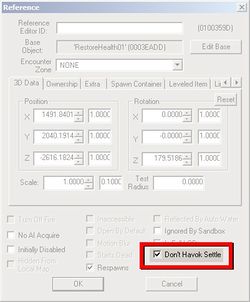
以前のBethesdaツールセットと異なり、このCreation Engineの物理法則有効オブジェクトはゲームが読み込まれる時、自動的に物理結果が出ます(落ち着きます)。(図Fig 3.16)のように「Don't Havok Settle」チェックをつけると、冒頭の物理結果をスキップしますが、ゲーム内で衝撃を受ける時、物理法則をシミュレートします。例えば、これにチェックをいれたバケツはゲームがロードされても、空中にとどまり続けます。しかし、矢や呪文やプレイヤーなどの物理法則を持った実体に衝突されると、他のオブジェクトのように振舞うでしょう。
(図Fig. 3.16)
そうしたい高度ユーザーは、物理法則シミュレーションを完全に無効にしてください。とりわけこのためにアタッチされる「defaultDisableHavokOnLoad」と呼ばれるPapyrusスクリプトがあります(このチュートリアルではこの使用方法は説明しません)。
Pressing the Run Havok Sim button, pictured in Fig. 3.15, with a moveable static selected will cause the object to behave as it would in-game. This is a great way to make clutter placement look more random, or to see how an object will act if the game were running.
- Select one of placed ruinsPot*s you've placed
- Raise and rotate it in mid-air above the floor
- Keeping the object selected, press the Havok button

- Allow the pot will fall to the ground and roll around until it settles
- When satisfied with the positioning of the pot, turn settling back off.

For advanced users who wish to disable the physics simulation of an object entirely, there is an included Papyrus script called defaultDisableHavokOnLoad (en) which can be attached specifically for this purpose, although its use is not necessary for this tutorial.
Animating Objects[edit | edit source]
Animating Objects(アニメーションオブジェクト)
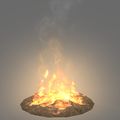
Moveable Staticのタイプは「Animating object」です。これはプレイヤーと相互作用することはありません(e.g プレイヤーがそのオブジェクトをアクティベーションしたりできない)が、粒子が舞ったり、アニメーションを提供します。例としては旗、炎、水滴などです。(壁に取り付けられた)突き出し燭台の炎エフェクトを置くのは、光源を作成する良い方法です - しかし、あなたは個々に「light-casting(光を投げかける)」アクターを加える必要があります。これについては後のチュートリアルで扱います。
Animating objectsとFXは一般にメインツールバーの「Animate Lights and Effects」でプレイビューすることができます。以前のBethesdaツールセットと異なり、それらのエフェクトをプレビューするのに、物理法則シミュレーションを有効にする必要はありません。
「Animating Object」の特性:
☆これらのオブジェクトは粒子やアニメーションしますが、定位置は変わりません
☆プレイヤーはこれらを操作することはできません
☆プレイヤーはこれらをインベントリーに追加できません
以下のサンプルのようなAnimating Objectをいくつか部屋に置いてみてください
「FXFireWithEmbersHeavy」 「GenericBannerBlue01」
死骸はPhysics Settlingを使用することで設置することができます。以前のBethesdaツールセットと異なり、単純に「Health(体力)」のセッティングにより、ゲーム時に実際にそれが死んだ状態になることはなくなりました。アクターが死んでいることにしたいならば、Referenceプロパティ上で「Starts Dead」チェックボックスにチェックを入れてください。(図Fig 3.16)でわかるとおり、「Respawns」の上でグレイアウトになっているのがそれです。
物理法則有効オブジェクトはシミュレーションがオンになっている間、その位置を調整することが可能です。微妙な位置を決定するには「Alt」キーを押しながらそのオブジェクトをドラッグしてください。これは死骸のような複数の関節があるオブジェクトの個々の骨などを掴む際などに便利です。
Animating objects are a type of moveable static that the player cannot interact with, but provides particles or an animation. Some examples would be banners, fires or water drips. Placing fire effects in sconces is a great way to create light sources - although you will have to add the actual light-casting actor separately. This is covered in a later tutorial (en).

Animating objects and FX can generally be previewed with the Animate Lights and Effects  button in the Main Toolbar (en). Unlike previous Bethesda toolsets, it is not neccessary to enable physics simulation just to preview these effects.
- The defining properties of an Animating Object
- These objects remain in place but have built in particles or animations
- Player cannot manipulate these in game
- Player cannot add these to their inventory
Place some animating objects around the rooms, such as the examples below.
Loot[edit | edit source]
Loot(戦利品)
新しいアイテムは探し、取得するのはSkyrim体験の中心要素です。そしてダンジョンの不可欠な一部であると考えるべきです。CKは戦利品(散漫に置かれたアイテムやコンテナやレベルドアイテムを含む)を持つダンジョンを事前に設定するいくつかの方法があります。使うことの出来るオプションについて見ていきましょう。
Ah, loot. Searching for and acquiring new items is a core element of the Skyrim experience, and should be considered an integral part of your dungeon. Luckily, the Creation Kit includes several ways to populate your dungeon with loot, including loosely placed items, containers and leveled items. Let's consider some of the options we can work with.
Loose Loot[edit | edit source]
Loose Loot(散漫な戦利品)
いかなるオブジェクトも空間に散漫に設置することができます。これは戦利品を供給する目的とその空間に視覚的な感心を持たせるという2つの目的を果たすのに役立ちます。ここにいくつかメジャーなオブジェクトタイプを挙げておきます:
防具 : プレイヤーが着る事ができるオブジェクトで、武具ではない衣服も含みます。グローブ、ブーツ、ヘルメットのようなシングル部分はエディタとゲームでそのままの物として現れますが、胸部部分のオブジェクトは折りたたまれた形で現れるでしょう。
本 : 通常の本屋部屋で投げ散らかすことができます。時々それを読むことで呪文を覚えたり、スキルが上がったりします。バニラのSkyrimダンジョンは通常、スキルブックがもしそこにあるならば、1つしか設置しません。プレイヤーは本をアクティブにするとそれは開きますが、それ自体を自動的に取得することはありません。
素材 : これらは食べ物や錬金素材です。プレイヤーが拾うことができ、消費することで効果が生じます。錬金術で使用するか薬作成のためのものです。
ポーション : 素材と同様です。
武器 : プレイヤーによって使用可能です。世界に置かれる時の形状は、プレイヤーが装備する時と同じ形状をしているはずです。
「Don't Havok Settle」はオブジェクトを壁掛けにする良い方法です。サンプルの南のホールの最後の部屋にはHead Sculpturesにいくつか武器が取り付けられています。
Just about any object in the editor can be placed loosely in your space. This can serve the dual purpose of providing loot and visual interest to a space. Here are a few of the major object types at your disposal:
- Armor: Any objects that the player can wear, including non-armored clothing. Single pieces like gloves, boots and helmets will show up in the editor/game as their normal pieces, but chest pieces will appear folded up.
- Books: Regular books are a great object to throw around rooms. Pepper in an occasional spell tome or skill book to keep the player reading them. Keep in mind that vanilla Skyrim dungeons typically only include one skill book, if any. When a player activates a book in the world it will open the book but not automatically give it to the player.
- Ingredients These are objects like food and alchemy ingredients that the player can pick up and consume for an effect. Used in alchemy and potion creation.
- Potions Similar to ingredients
- Weapon (en)s The weapons usable by the player. When placed in the world these will appear the same as when the player would have them equipped.
Containers[edit | edit source]
Containers(入れ物・コンテナ)
Container(コンテナ)とはプレイヤーが戦利品として開くと(中に入っている)そのリストが開かれる宝箱や壺のようなオブジェクトのこといいます。箱はそのセルがロードされる時にその中身が確定します。箱を設置する主な利点の一つとして、その殆どの既存の箱は、プレイヤーのレベルに合わせた戦利品を調整してくれることです。
それはプレイヤーのレベルに合わせて、勝手に見積もりをしてくれるので、別々のオブジェクトをその中に置く必要がありません。以下サンプルのように部屋に幾つかのコンテナを設置してください。接頭語に「Treas~」がつくものに注意してください。これは「Treasurea(宝箱)」の短いつづりで、これらの入れ物はより価値のあるアイテムが入っている可能性が高いです。
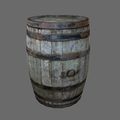
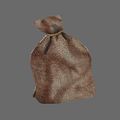
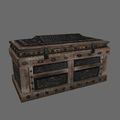
「BarrelFood01」 「MiscSackLarge」 「TreasDraugrChest」 「TreasRuinsUrnLarge02」
Containers are objects like chests and urns that have an internal list of what the player can receive when looted. The chest fills itself when the cell is loaded. One of the major benefits of placing a chest is that most pre-made chests are designed to scale the loot to the player's level. That way you don't have to place separate objects to take the player's level in to account.
Place some containers around the room, such as the examples below. Note the "Treas" prefix. This is short for "treasure", meaning that these containers are more likely to have items of value.
Previewing Contents[edit | edit source]
Previewing Contents(内容をプレビューする)
CKは様々な「encounter zone」levels(エンカウンターゾーンレベル)でどのようなコンテナの内容もプレビューできる能力があります。これはプレイヤーがどんな戦利品と対面するかを知るのに有益な方法かもしれません。大部分のランダム化されたゲーム内の戦利品を知ることは難しいと思われるからです。
[1] プレビューで見たいオブジェクトをダブルクリックします
[2] コンテナのBase Objectを見るため「Edit Base」をクリックしてください(図Fig 3.19)
(図Fig 3.19)
[3] 「Preview Calculated Result」ボタンをクリックしてください
[4] これはランダムで生成されるかもしれない戦利品のリストを表示します(図Fig 3.20)
(図Fig 3.20)
[5] 何回も追加可能な戦利品結果を見たい場合、これを繰り返してください
[6] 異なるレベルでどのような戦利品があるのかを確かめるため、プレビューレベルを変えることもできます。注意:コンテナのレベルはそのエリアのエンカウンターゾーンに基づいています。それはいつも現在のプレイヤーレベルと同じというわけではありません。
[7] (図Fig 3.21)はプレイヤーレベル30における箱の例です
(図Fig 3.21)
The Creation Kit offers the ability to preview the contents of any given container at various encounter zone (en) levels. This can be a useful way to get an idea of what sort of loot the player may see, which can be difficult to approximate in-game due to the randomized nature of most loot containers.
- Double click on the object you want to preview
- Click Edit Base to view the container Base Object (Fig 3.19)
- Click on Preview Calculated Result (Fig 3.19a)
- This displays a randomly-generated list of loot the container may produce (Fig 3.20)
- Repeat this as many times as you'd like to see additional possible loot results
- You can also change the preview level to see what the loot would be like at different levels. Note that the level of a container is based on the encounter zone (en) of the area a container is within, which may not always be the same as the current player level.
- Fig 3.21 shows an example of the same chest at player level 30
Leveled Items[edit | edit source]
Leveled Items(レベルドアイテム)
Leveled itemまたは「ダミー」オブジェクトはCKの新しい機能です。これらはレベルに適切な戦利品を置く事ができます。詳しい情報はこのチャプターを読みすすめてください。
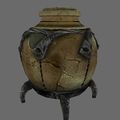
CKは多くのダミーオブジェクトがあります。これらは周りに漠然と設置する事ができる、様々な戦利品のサイズや形に似ている単純なマーカーのことです。ダミーオブジェクトはそれ自身では何もしません。また、ダミーオブジェクトはゲームで戦利品を発生させるよう関連付けられたLeveled Itemリストを持たなければなりません。それではダミーを使用したLeveled Potionを設置してみましょう。
[1] 「DummyPotion」オブジェクトを設置してください。そのマーカーを表示するには「M」キーを押してください
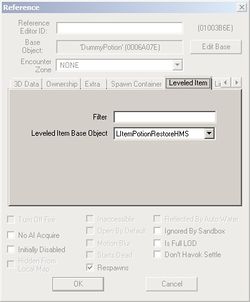
[2] そのオブジェクトをダブルクリックして、「Leveled Item」タブを見てください(図Fig. 3.30)
(図Fig. 3.30)
[3] 望んでいるポーションタイプを検索するのに「Filter」を使用できます
[4] 「Filter」に「Restore」とタイピングしてください
[5] 「Leveled Item Base Object」に「LItemPotionRestoreHMS」をセットしてください
☆「LItem」は「Leveled Item」の字面を省略した略語です。「HMS」は「Health(体力)/Magicka(マジカ)/Stamina(スタミナ)」の略語です(これはそのポーションが3つのうちの1つを回復するという意味です)。
☆またあなたは「Best」が接頭語にあるアイテムを選択できます。これは現在のレベルに最適なアイテムを生産する試みをするものです。
ダミーアイテムはマーカーとみなされます - したがってあなたは「M」キーでそれらを見る事ができるようにしてください!

Leveled items, or "dummy" objects, are a new feature in the Creation Kit. These allow you to place loose items that will be leveled appropriately in a space. Read on for more information!
The Creation Kit features a number of Dummy objects. These are simple markers that approximate the size and shape of various loot objects that can be loosely placed around the environment. Dummy objects do nothing on their own, and must have a Leveled Item list associated to generate loot in-game. Let's place a leveled potion using a dummy now:
- Place a dummyPotion object in the level. Be sure markers are displayed ("M" hotkey)
- Double click on the object and go to the Leveled Item tab (Fig. 3.30)
- You can use the filter to search for the type of potion you want
- (optional) Type restore in the filter.
- Set the Leveled Item Base Object to LItemPotionRestoreHMS
- "LItem" is shorthand for Leveled Item. "HMS" is an abbreviation of Health/Magicka/Stamina, which means this potion will restore one of those three resources.
- You can also choose items with the "Best" suffix, indicating that the list will attempt to produce the best item appropriate to the current level.
Some Dummy Objects[edit | edit source]
Some Dummy Objects(いくつかのダミーファイル)
以下はあなたが使用できるいくつかのダミーオブジェクトです。ダンジョンに幾つか設置してみて、異なるLeveledリストで実験してみてください。そして忘れないでください - あなたがLeveled Itemをセットしないと、ゲーム中それは出現しません。
同様に、ダミーオブジェクトはアシスタントにすぎないことを忘れないでください。そしてそれらはLeveled Itemリストについて何も知りません。この意味は、もしあなたが、「LItemArmorShieldHeavy」をセットした「DummyPotion」を設置してしまった場合、そのアイテムはセルがロードされた時に盾を生成するでしょう。生成された盾はそのダミーオブジェクトがどう置かれたによって、世界に交差する(他のオブジェクトにめり込む等)おそれがあります。
☆DummyBook ☆DummyBoots ☆DummyBow ☆DummyCuirass ☆DummyDagger ☆DummyGauntlets ☆DummyHelmet ☆DummyMace ☆DummyPotion ☆DummyShield ☆DummySoulGem ☆DummyWeapon1H - Can be any one-handed weapon(片手武器ならなんでも) ☆DummyWeapon2H - Can be any two-handed weapon (両手武器ならなんでも)
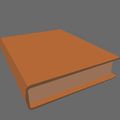
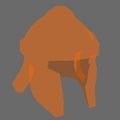
「Dummy Book」 「Dummy Helmet」 「Dummy Mace」 「Dummy Potion」
The following are some of the dummy objects you can use. Try placing some around your dungeon and experiment with the different Litem lists available. Remember - if you do not set a Leveled Item, nothing will appear.
Likewise, remember that the Dummy objects are only helpers, and know nothing about their Leveled Item lists. This means that if you accidentally set up a dummyPotion object with a LItemArmorShieldHeavy list, for example, the item will generate a shield at run-time. The resulting shield is likely to intersect the world, depending on how the dummy object had been placed.
- DummyBook
- DummyBoots
- DummyBow
- DummyCuirass
- DummyDagger
- DummyGauntlets
- DummyHelmet
- DummyMace
- DummyPotion
- DummyShield
- DummySoulGem
- DummyWeapon1H - Can be any one-handed weapon
- DummyWeapon2H - Can be any two-handed weapon
Furniture[edit | edit source]
Furniture(家具)
Placing Markers[edit | edit source]
Placing Markers(マーカーの設置)
家具マーカーを置く時は適切な方向に向いている必要があります。これは椅子のように、いつも明白であるわけではありません。例えばベンチに座るNPCが壁にめりこむような場所に設置してしまう失敗は容易に起こりえます。これがないかどうかチェックする最も簡単な方法が「M」キーでマーカー表示に切替えることです。それでは実際にベンチを置いてみましょう。
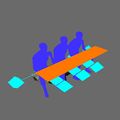
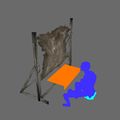
[1] (図Fig. 3.31)にあるように「RuinsBench01」を置いてみてください
(図Fig. 3.31)
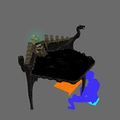
[2] (図Fig. 3.32)は同じベンチですが、「M」キーでマーカー表示に切替えています
(図Fig. 3.32)
[3] 青のヒューマノイドモデルはマーカー表示の時だけ表示されます。彼らが向く方向を確かめてください
[4] 水色のダイアモンドは入り口/出口(それに座る時、立つ時の隙間)を示しており、壁やオブジェクトでそれを妨げるべきではありません
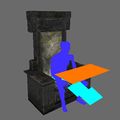
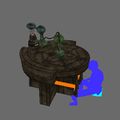
[5] 以下の(図Fig. 3.33と3.34)のオブジェクトを含んで、いろいろな家具を周りに設置してみてください
(図Fig. 3.33) (図Fig. 3.34)
Exit Nodeを確保することは重要です。さもなければ、アクターは立ち往生することになります。
When placing a furniture marker, it is important to make sure that it is facing the proper direction. This isn't always obvious, as with a chair. It's easy to accidentally place a bench that will seat NPCs facing into a wall, for example. The easiest way to check for this is with the 'M' hotkey which will toggle markers. Let's place a bench now.
- Place a ruinsBench01, as shown in Fig. 3.31.
- Fig. 3.32 shows the same bench with markers toggled on ('M' Hotkey)
- The blue humanoid models are where the actor will be while in the marker. Make sure they face out.
- The light blue diamonds indicate entry/exit nodes, and should not be blocked by any walls/objects.
- Place more furniture around the level, including the examples in Fig. 3.33 and 3.34 below.
Interactive Furniture[edit | edit source]
Interactive Furniture(インタラクティブ家具)
家具マーカーの中には「Crafting Station(製作台)」のようなインタラクティブなものもあります。これは通常の家具マーカーと同じように設置されます。(図Fig. 3.35~3.37)のようなインタラクティブ家具を設置してみてください。この種類の家具は特にNPCが居住しているようなダンジョンに生活感をだすのに役立ちます。
「Crafting AlchemyWorkbench」 「Crafting TanningRackMarker」 「Crafting EnchantingWorkbench」
製作台オブジェクトのいくつかに食卓バージョンがあります。これは他のオブジェクトを置く事ができますが、他の製作台オブジェクトと同じ使い方をします。これらのアイテムを床に設置する場合、NPCやプレイヤーがそれを使用している間、水没や浮いてしまわないように気をつけてください。
Some furniture markers are interactive, such as crafting stations. These are placed in the world just like regular furniture markers. Place some interactive furniture around the level, such as the examples in Fig. 3.35-3.37. This kind of furniture is especially useful for creating a sense of life in NPC-populated dungeons, although we won't be using them as such in this example.
Doors[edit | edit source]
Doors(ドア)
プレイヤーによってアクティベートされるとドアは開いたり、閉まったりします。それらは任意に鍵が必要な場合を含む、ロックをすることができます。
またドアは初めから「開いている」ようにセットすることもできます。これをするには、そのドアの「Reference」を開いて「Open By Default」にチェックを入れてください。これはそのドアの動作チェックに役立つことがあります。また手動で箱を既に略奪されているように見せるようにセットすることもできます。
「Open By Default」はコンテナでも可能です。これは動作チェックに役立つことがあります。
Doors simply open and close when activated by the player. They can optionally be locked at various difficulties, including requiring a Key to open.
Doors can also be set to start open; to accomplish this, check the Open By Default box on the reference properties. This is also a useful trick to see which way the door opens. Generally speaking, it's best to have doors swing away from the player when possible.
The doors that work with this kit begin "Nor" - such as NorDoorMedium01 and NorDoorSm01.
The various parts of the name are once again meaningful:
- MinUse - The base object has the "Minimal Use" checkbox checked, which means NPCs will avoid this door if possible. This is useful to prevent NPCs from wandering into the wrong areas, and possibly to prevent companions from rampaging through inside areas that the player has not yet explored, just to get to an outer balcony.
- Load - These doors are for teleporting to new areas. They typically do not open properly, and have only one side, and a slight "starting to open" animation.
Locking Doors & Containers[edit | edit source]
Locking Doors & Containers(ドアとコンテナをロックする)
ダンジョンにロックされたオブジェクトを設置しましょう。ドアとコンテナ好きなほうを選んでください。
[1] そのドアをダブルクリックして「Reference」を開いてください
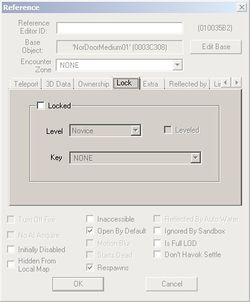
[2] 「Lock」タブを開いてください(図Fig. 3.38)
(図Fig. 3.38)
[3] 「Locked」チェクボックスにチェックをいれてください
[4] 「Level」はロックの難易度のレベルです。Requires Keyはピッキングができないことを意味しています
[5] 「Key」フィールドはそのドアを解除できる鍵を決定します
Critical-Pathドア(その空間やクエストの進行を妨げるドア)をロックして、もし鍵をどこにも提供しないとしたらそれは悪いアイディアです。同じように、バッグや樽のような鍵穴のないものにロックをするのを避けるのは良いアイディアです。
Let's try locking an object in your dungeon. You can lock a door or a container; it's your choice.
- Double click on the door to open the reference
- Navigate to the Lock tab (Fig. 3.38)
- Check the Locked check box
- Level is the difficulty of the lock. Requires Key means it cannot be picked.
- (optional) The Key field is for any key that can unlock the door.
Cluttering Lokir's Tomb[edit | edit source]
Cluttering Lokir's Tomb(散乱したLokir's Tomb)
空間を散乱させるためのツールはたくさんあります。ここで学んだ全てを使って、散乱させてみてください。そしてそれぞれの部屋の目的とストリーの目標があるなら、それを忘れないでください。もしあなたが行き詰ってしまったならば、他のセルを読み込んでみたり、サンプルプラグイン(Lokir's TombのCluttered version)をロードしてみてください。
あなたがその墓のレイアウトと散乱に満足したならば、敵と従者が歩けるように準備しましょう。次のチュートリアルである「Navmesh」を参照してください。 As you can see, there are many tools at your disposal for cluttering a space. Try employing everything you've learned here to flesh out the clutter in this, keeping in mind the purpose of each room and any story goals you may have. If you're stuck for ideas, try checking out other cells in the editor or load up the example plugin, which shows a fully cluttered version of Lokir's Tomb.
Once you're satisfied with the layout and clutter of the Tomb, you're ready to move onto making the space navigable for enemies and followers - covered in the next tutorial: Navmesh!
Object Palettes (OPALs)[edit | edit source]
Object Palettes (OPALs)
(オプション)
上で説明したコピーと置換え方法はclutterを置くための(特にあなたがCKの命名規則に慣れると)早い方法です。またあなたはObject Pallettesで実験をしたがっているかもしれません。それはオブジェクトのコレクションを管理・作成することができ、それらを直接世界に設置できます。詳しくはOPALページ上のチュートリアルを参照してください。
OPTIONAL
While the Duplicate-and-Replace method described above is a fast way to place clutter (especially once you become familiar with the Creation Kit's naming conventions), you may also want to experiment with the Object Palettes (OPAL) (en), which allows you to create and manage collections of objects, and place them in the world directly. For more information, please refer to the tutorial on the OPAL (en) page.
| チュートリアルハブに戻る | 次のチュートリアル | ||
| Language: | English • français • 日本語 • polski |
|---|
